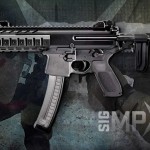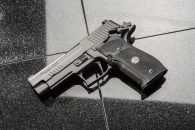
Not long after purchasing my Sig Sauer MPX in pistol configuration, it was obvious to me that the most effective and natural configuration for this weapon is a Short Barreled Rifle (SBR). “Converting” a firearm to an SBR can be done in a number of ways, but it usually entails either installing a barrel shorter than 16″ on a rifle, or adding a stock to a pistol so that the overall length of the weapon is under 26″. For full legal details, refer to the National Firearms Act (NFA). Different states have different laws and regulations, so make sure you’re informed as to the requirements and legalities in your particular area.
Converting a pistol or rifle into an SBR (or converting a shotgun into an SBS) is considered “creating a new firearm,” which means you’re required by law to file form 5320.1 (more commonly referred to as simply “Form 1”) with the Bureau of Alcohol Tobacco Firearms and Explosives (BATFE, though more commonly referred to as the “ATF”). If you prefer to keep things old-skool, you can fill out the paper version of the form (in duplicate) and pop it in the mail along with a $200 check to cover the “tax” required for a conversion. Or you can do what I do and use the ATF’s eForms system to file your form and pay the tax online. This article walks you through the steps necessary to register an SBR using the eForms system as of June 2015. The steps required to “create” other types of NFA firearms (such as SBS or suppressor) are very similar.
Things to Know Before You Get Started
- For the examples in this article, our friend Joe Schmoe of Schenectady, NY is e-filing ATF Form 1 to convert his Sig Sauer MPX pistol into an SBR. He’s already set up a gun trust called “Joe’s Awesome Trust,” which will make the process much easier. You can certainly file a Form 1 as an individual, but it has more requirements — including fingerprints, ID, and the signature of your local chief law enforcement officer (or “CLEO”), which can sometimes be near impossible to get in some areas. I highly recommend that you follow Joe’s lead and establish a gun trust to register your NFA items. There’s lots of great information on gun trusts online, and I recommend reading up on them at GunTrustLawyer.com (I have no affiliation). There are a number of services available online that can set up a gun trust for you at very reasonable costs, or you can find an attorney in your area that specializes in them. Keep the full legal name of the trust or other legal entity under 50 characters, or you won’t be able to file the eForm.
- It’s worth noting that Joe is not doing this on a Wednesday. As of the writing of this article, the ATF takes the eForms system offline every Wednesday, presumably for maintenance and upgrades. Of course, the ATF is a government agency, and so while I consider their eForms site surprisingly effective when compared to other government sites, that’s not really saying much. Set your expectations appropriately; it’s nowhere near as fast or reliable as most websites you probably use on a daily basis. Even if it’s not a Wednesday, the site can be slow and buggy. The ATF can (and has in the past) simply taken the system offline without warning and declared eForm submissions indefinitely suspended. But if you’re patient and persistent, I still think it beats filling out paper forms.
- The “help” section for the ATF’s online tools are pretty much non-existent. But like most government forms, the instructions for the paper version are quite extensive. If you’re ever unsure about what to put somewhere, check the corresponding field on the paper version of ATF Form 1, and scroll down to the instructions section.
- Read through the ATF’s January 2015 eForms Bulletin to better familiarize yourself with the eForms system. There’s lots of useful stuff in there.
- If you make a mistake on your eForm, and don’t catch it before you submit it, you can’t edit it. From the January 2015 eForms Bulletin: “We cannot make changes to a submitted NFA eForm. If you make an error in the name or serial number, you will need to contact the NFA Branch at (304) 616-4500 and request the withdrawal of the form. You will then need to submit a new application. Please ensure that the information is correct upon submission.”
- Don’t be afraid to “Ask the Experts.” There’s a tab in the ATF’s eForms system that allows you to send questions on a variety of topics directly to a”Subject Matter Expert” via email. Their 2015 eForms Bulletin claims that “All questions submitted through Ask the Expert will be responded to within two business days.” I’ve used it a few times, and have always received a reply within that time-frame. So if you have any questions about anything related to your form, give it a try!
- DISCLAIMER: I repeat this below, but I want to say it right up front. There are many laws surrounding firearms, and most of them have very serious consequences if violated. It’s 100% YOUR responsibility to understand any and all laws that might apply to you before making any modifications to any weapons. I’m not a lawyer and I don’t play one on TV. Nothing in this post, comments, or anywhere else on this website should be construed as legal advice. Proceed at your own risk and peril. Always keep things 100% legal, and seek legal advice if you’re not sure what that means in your particular case. I’m trying to be helpful, but I’m not going to take any part of the blame if you decide to be an idiot and violate Federal firearms law.
So if you’re ready to file your Form 1, follow these steps along with Joe to increase your chances of getting your form approved (but there are no guarantees — the ATF can sometimes be more indecisive than a contestant on The Bachelorette).
Step 1: Register an eForms Account
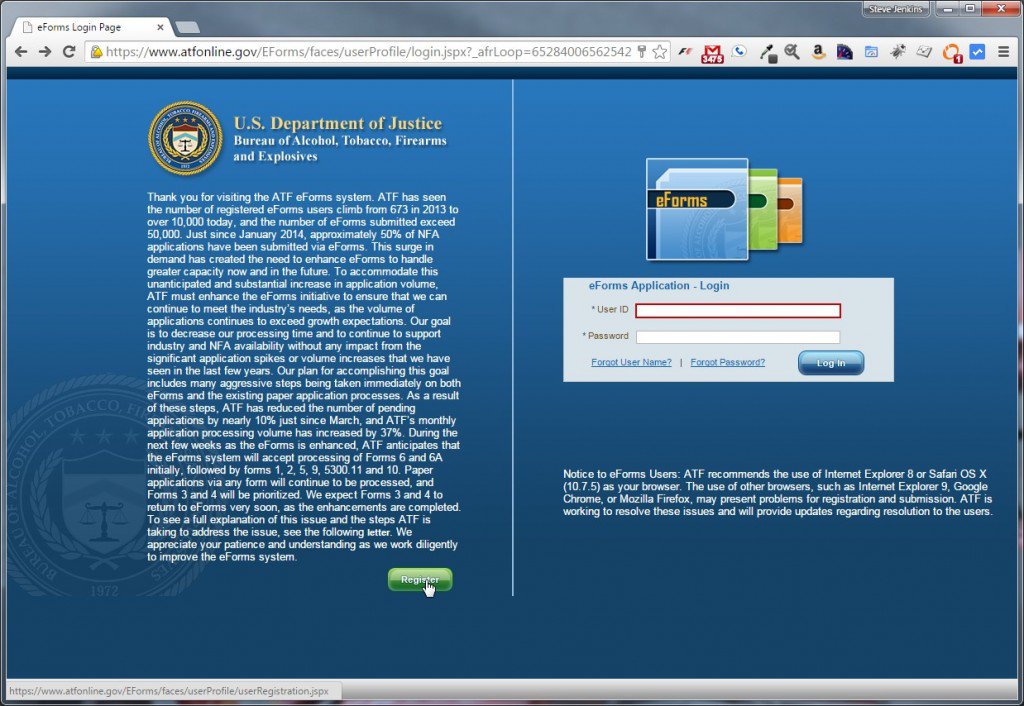
Go to https://www.atfonline.gov/EForms/, where you have the option to either Log In or Register a new account.
ATF eForms Home Page
If you already have an account, skip to Step 2. If not, press the Register button and you’ll see the User Registration screen:
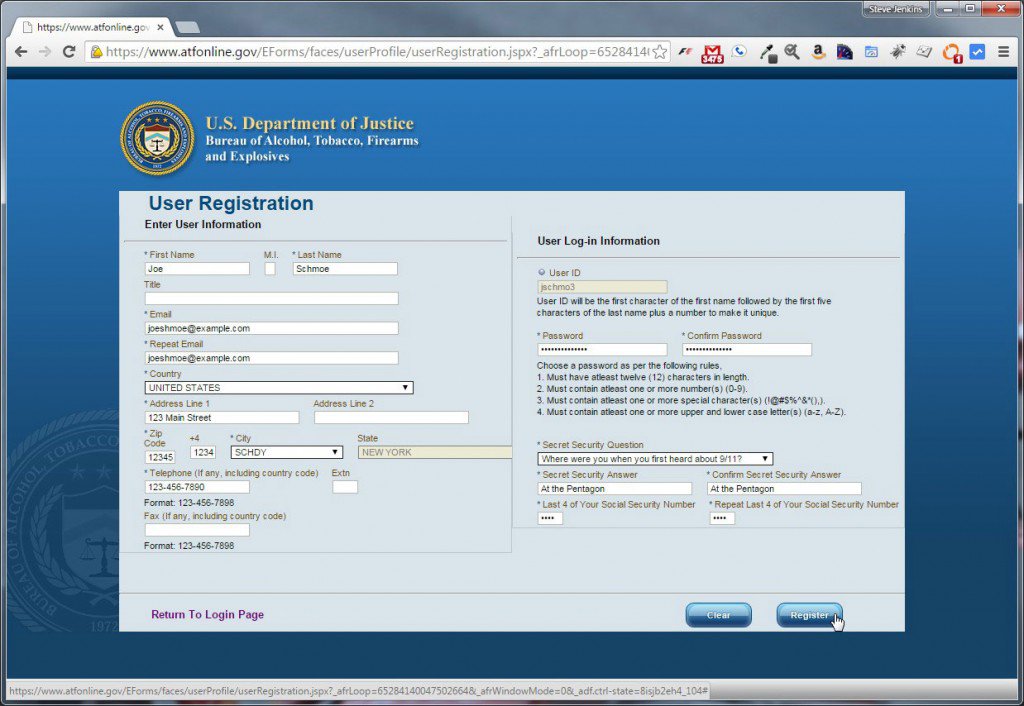
ATF eForms User Registration
Fill our your personal information. Required fields are marked with asterisks. For Address Line 1 (and Address Line 2 when needed), do not use a P.O. box. In its January 2015 eForms Bulletin (referenced above), the ATF said “Please do not use a PO Box address as the address for the maker (eForm 1). The physical address of the legal entity (trust, LLC, etc.) must be used.” I interpret this to mean that you shouldn’t use a P.O. Box anywhere on an eForm. If you were filing a paper Form 1, you’d be able to use a P.O. box as your mailing address for item 3b, as long as you also included a physical address in 3c. But since this is an eForm, P.O. boxes are not allowed anywhere on the form.
You won’t get to select a User ID (it will automatically create one for you based on your first and last name). The password requirements are strict: it must be at least 12 characters and contain at least one number, one special character, one upper case letter, and one lower case letter. Once you’ve filled everything out, press Register. You’ll get a confirmation screen, and a confirmation email will arrive in your email inbox within a few minutes. You don’t have to click anything in the email to confirm your registration, but it will contain the username you’ll need to log in.
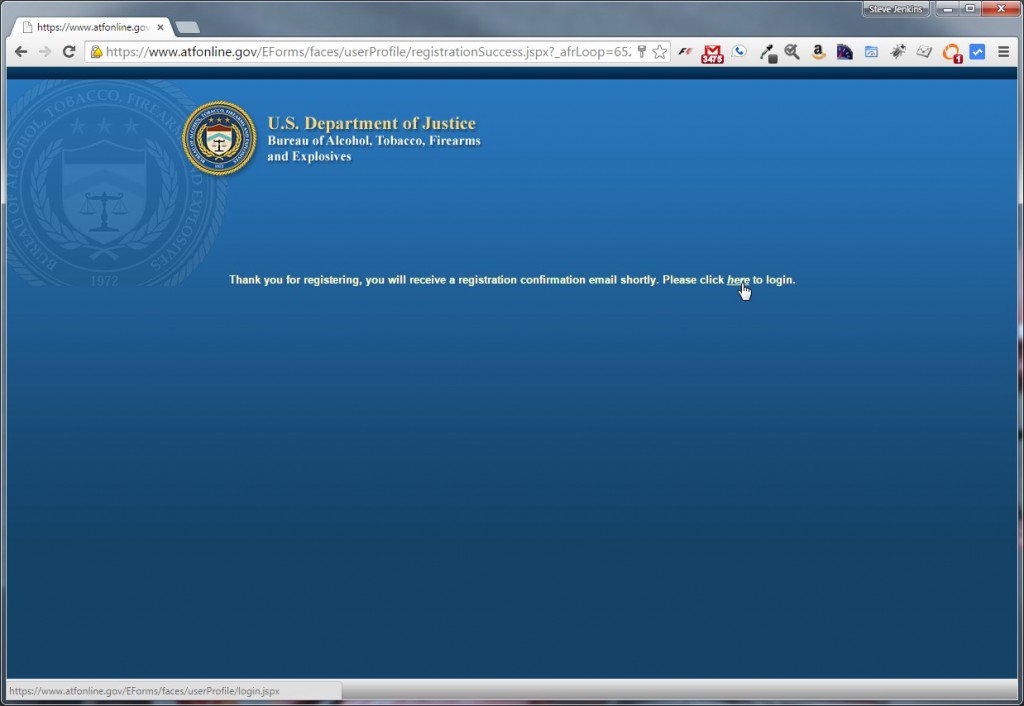
ATF eForms registration confirmation screen
Step 2: Log In to eForms
Back on the eForms Login Page, enter your assigned username and 12+ character password to log in.
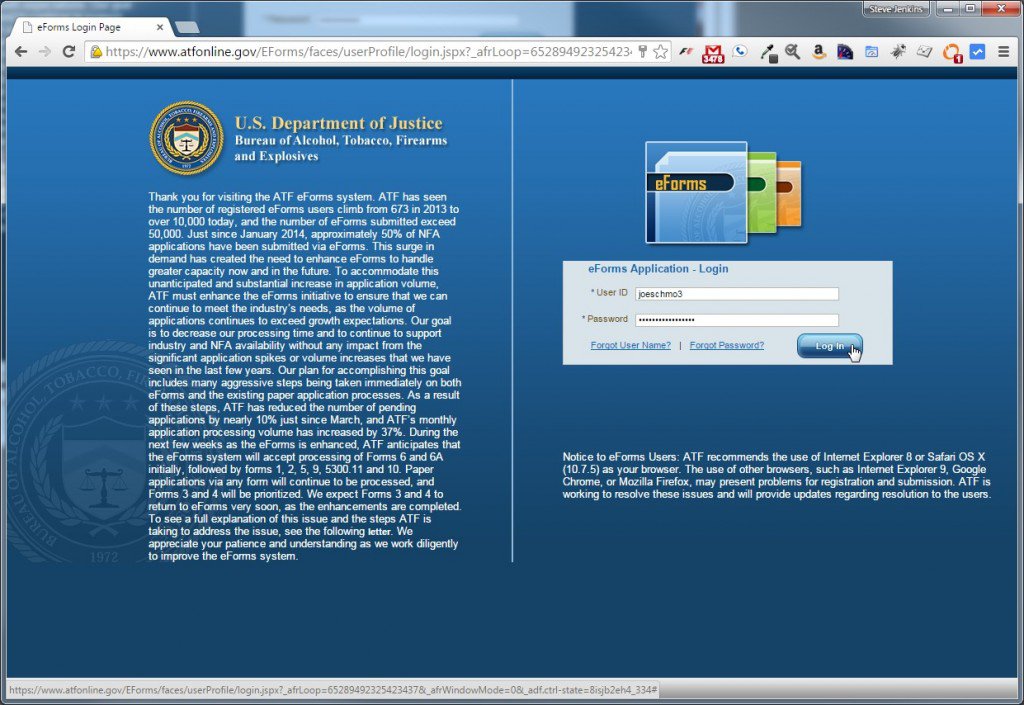
ATF eForms login page
Once inside, you’ll receive a warning banner telling you that everything you do on this system is being monitored (duh):
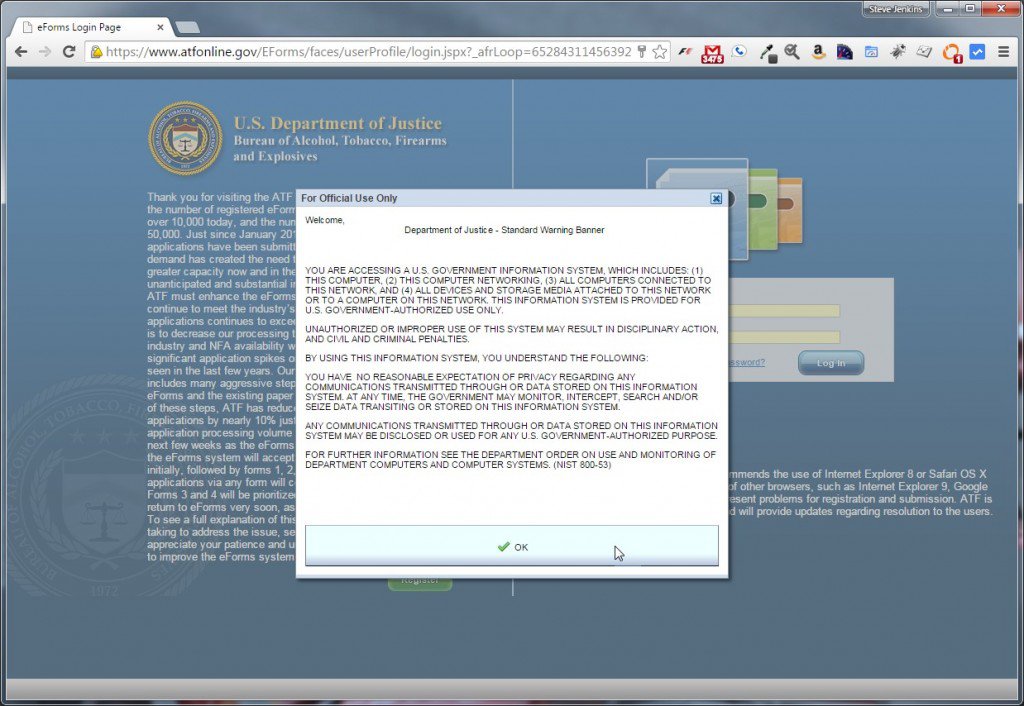
ATF eForms warning banner
Press the OK button to land on the eForms Home Screen.
Step 3: Select ATF Form 1 from the Home Screen
Your eForms Home Screen lets you see any forms that were previously approved, or in “draft” status, or submitted and awaiting review. If this is your first time logging in, your My Forms area will be blank:
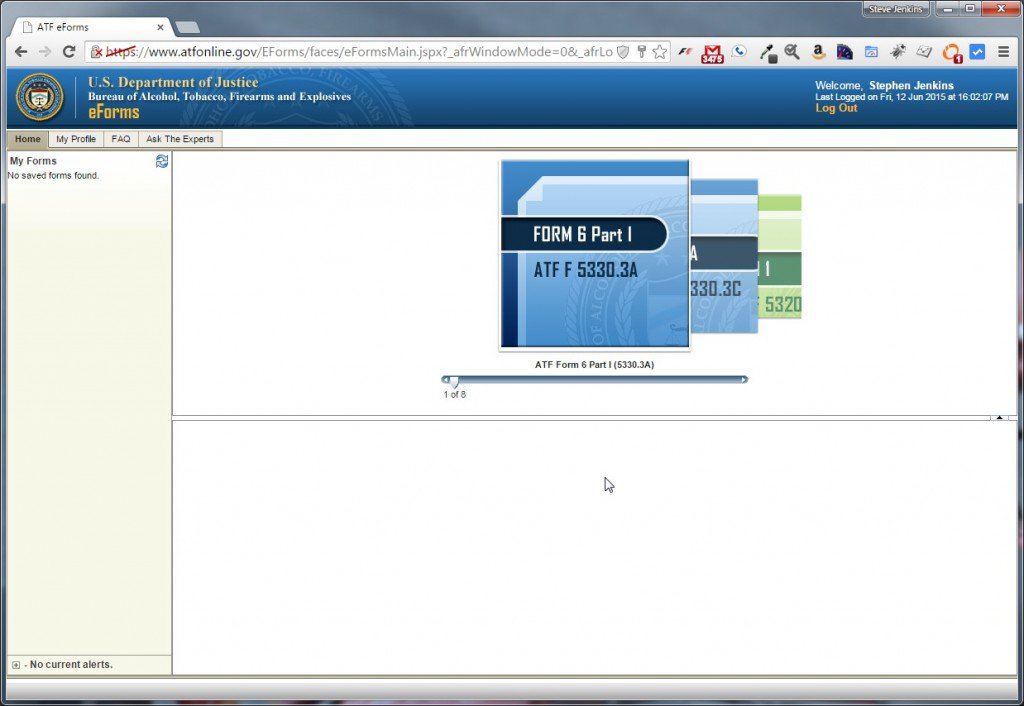
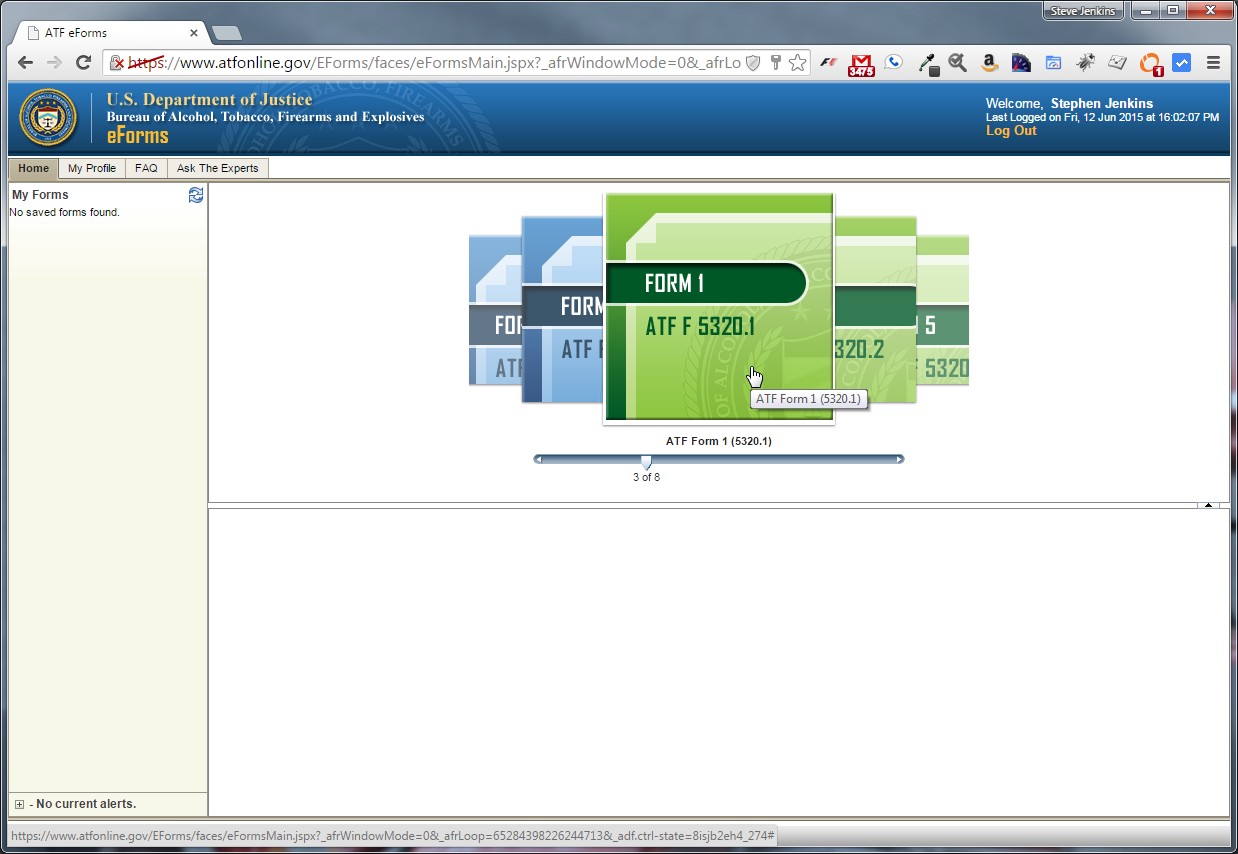
Main ATF eForms screen after login
Slide the selector in the middle of the Home Screen to the right until it selects Form 1:

Form 1 selected
Click the Form 1 image to launch the eForm.
Step 4: Fill Out ATF Form 1
This section will walk you through how to fill out the actual form. There are five sections on the eForms version of ATF Form 1, and then a final step where you pay the tax:
- Application: You tell the ATF what type of application you’re submitting.
- Applicant: You tell the ATF about the individual or entity (usually a Trust or Corporation) submitting the form.
- Line Item: You tell the ATF about the firearm for which you’re submitting the form.
- Electronic Documents: You provide any documentation required by the form (in the case of a Trust or Corporation, this would be your Trust Documents or Articles of Incorporation).
- Certify: You verify the information provided and digitally “sign” the form.
- Pay, Sign, and Submit: You pay the $200 tax and submit the form.
I’ll address each section below as a separate sub-step (4.1, 4.2, etc.). But before filling out the first section, you must read the Intended User of Form statement, which explains how ATF Form 1 should be used:
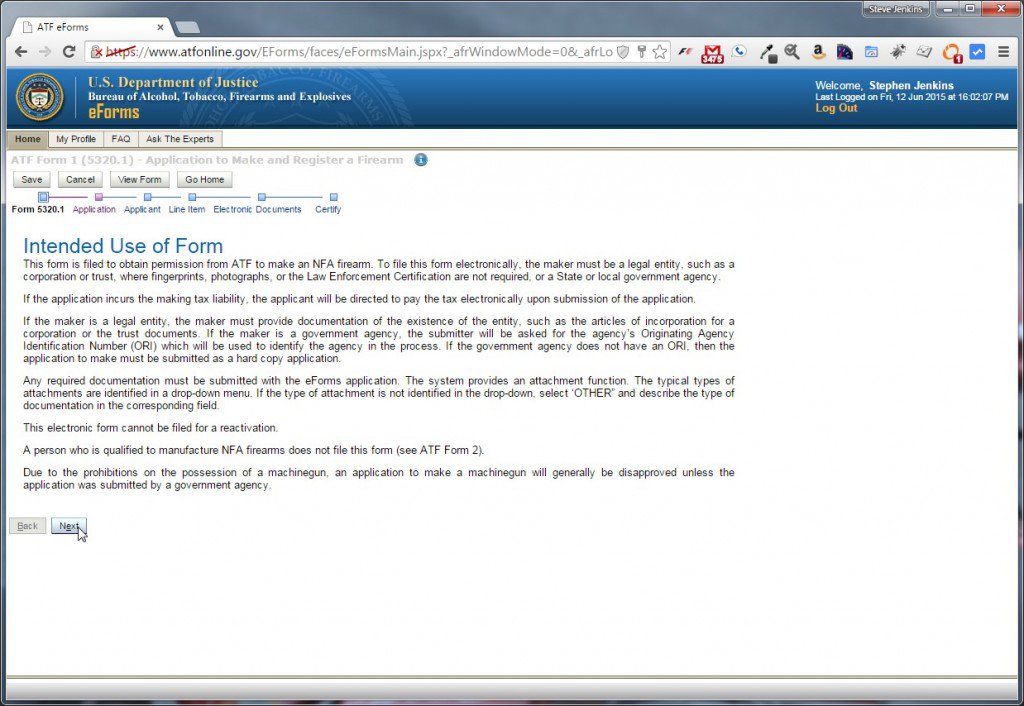
ATF Form 1 Intended Use of Form
Press Next to move on to the Application section of the form.
Step 4.1: Application Section
The Application Section of ATF Form 1 tells BATFE what type of application you’re making, and whether it’s being made by an individual, legal entity (such as a Corporation or Trust), or a government entity:
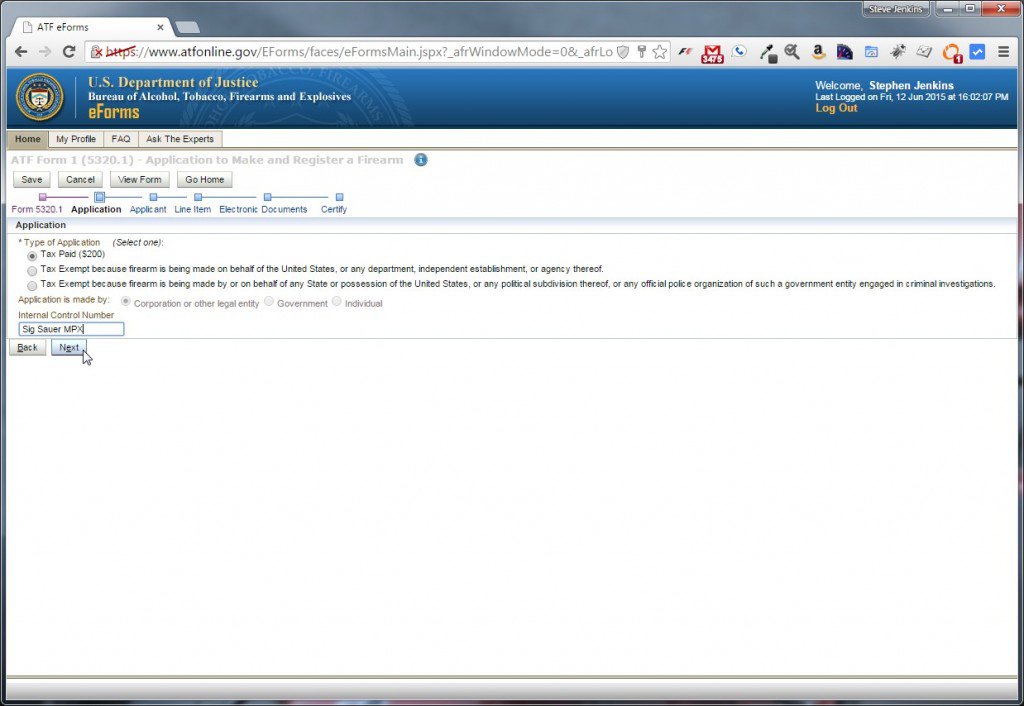
ATF Form 1 Application Type
Unless you’re working on behalf of a tax-exempt government agency (and if you are, this how-to is not for you), select the Tax Paid ($200) option to indicate that you’re filing this form to pay the $200 required tax to register an NFA firearm. If you’re planning to own the firearm as an individual, select that under Application is made by. Our buddy Joe is using his gun trust, so he picked Corporation or other legal entity.
You can also type in anything you want as the Internal Control Number. This is only for your reference, so I recommend using something that will quickly remind you which item this Form 1 refers to, such as “Sig Sauer MPX.” Keep in mind, however, that the ATF is not known for its sense of humor… so I don’t recommend using this box as an outlet for your comedic genius.
When you’re done with the Application type, press Next to move on to the Applicant section.
Step 4.2: Applicant Section
Here’s where you tell the ATF about the applicant.
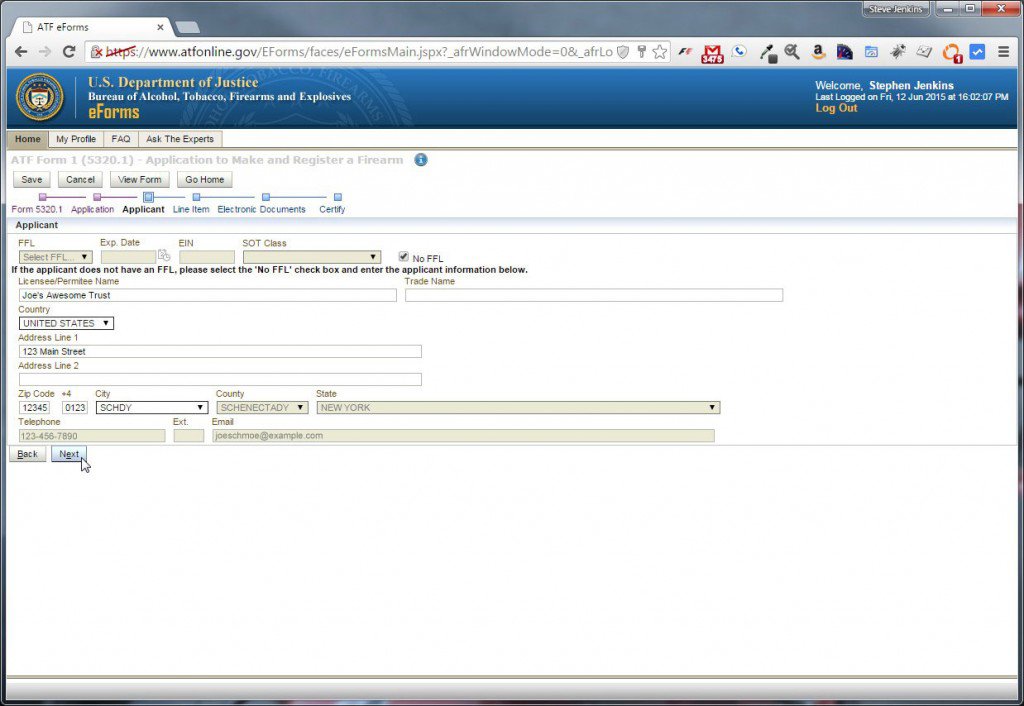
ATF Form 1 Applicant Section
Check the No FFL box, unless you’re a firearms dealer with a current Federal Firearms License (in which case, again, this tutorial is not for you). Then enter the Licensee Name. If you selected “Individual” in the previous section, use your legal name here. If you selected “Corporation or other legal entity,” use the entity’s legal name. Joe’s using his gun trust, so he used the trust’s legal name, which is “Joe’s Awesome Trust.”
Choose the country in which the individual resides or entity exists, then fill out the address (again, do not use a P.O. box), phone, and email information. You privacy nuts may choose not to include any or all of this info, and I’ve heard of forms being approved without it. However, I recommend including it. If there are any problems, mistakes, or questions concerning your form, they can often resolve the issue with a quick phone call or email. I’ve interacted with the ATF on a few occasions, both on the phone and in-person, and without exception found them helpful, accommodating, and downright friendly. Of course, it probably helped that on each of those occasions, I was on the right side of the law. 🙂
When you’re done entering the applicant’s info, press Next to move on to the Line Item section.
Step 4.3: Line Item Section
The Line Item section of ATF Form 1 lets you tell the ATF about the product you’re registering.

Press the Add Firearm button and a dialog box will pop up that walks you through three steps.
Step 4.3-1: Manufacturer Info
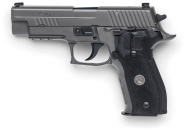
Step 1 of the Add Firearm box asks you to prove information about the manufacturer. Start type the firearm manufacturer’s name in the Manufacturer Name box, and the system will attempt to auto-complete it. Since Joe is using this form to legally convert a Sig Sauer MPX into an SBR, he typed “SIG,” then selected “SIG ARMS (SIG SAUER)” from the drop down box.
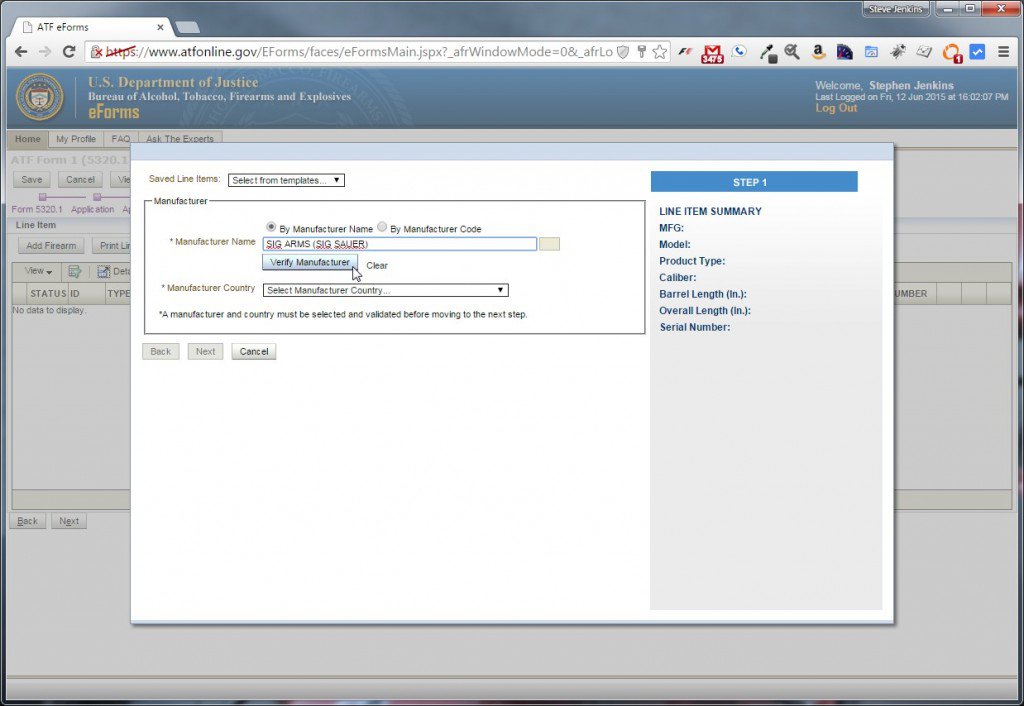
ATF Form 1 Add Firearm box
After typing in the name, click the Verify Manufacturer button to make sure that manufacturer you entered matches one that’s known to the ATF. If it is, you’ll get a success response that looks like this:
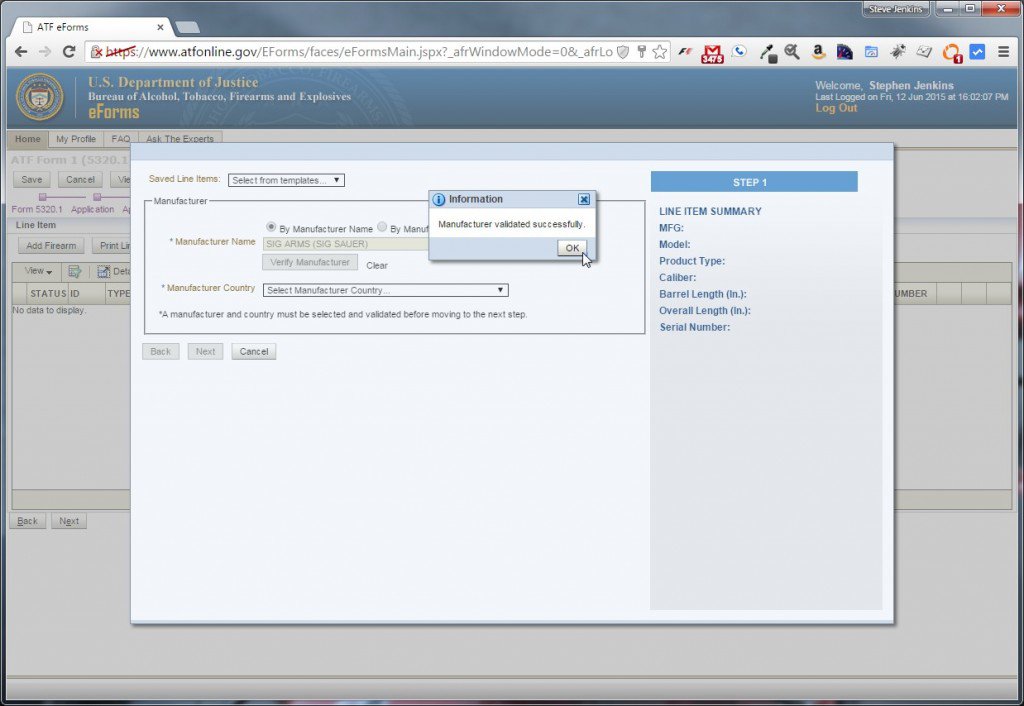
This means the ATF knows about your manufacturer.
If you don’t get a match, maybe you misspelled the manufacturer. Check the drop-down list again. If your manufacturer truly isn’t in the list, or you’re making your own gun and designating yourself as the manufacturer, you won’t be able to use the eForm version of Form 1. You’ll have to fill out the written form, and probably jump through a few more hoops that aren’t covered in this tutorial.
Once you’ve matched your manufacturer, choose the Manufacturer Country. This will normally be stamped or engraved on the side of your firearm. Keep in mind that a good number of foreign firearms manufacturers have manufacturing facilities in the US, so use “United States” if a US state is engraved on your firearm (a Sig might say “Exeter, NH” or a CZ might say “Kansas City, KS”) then consider that firearm “made” by a US manufacturer. There’s no problem with choosing a foreign country here, however, so don’t be afraid to do so if that’s the actual case. Joe’s Sig MPX has New Hampshire stamped on it, so he chose “UNITED STATES.”
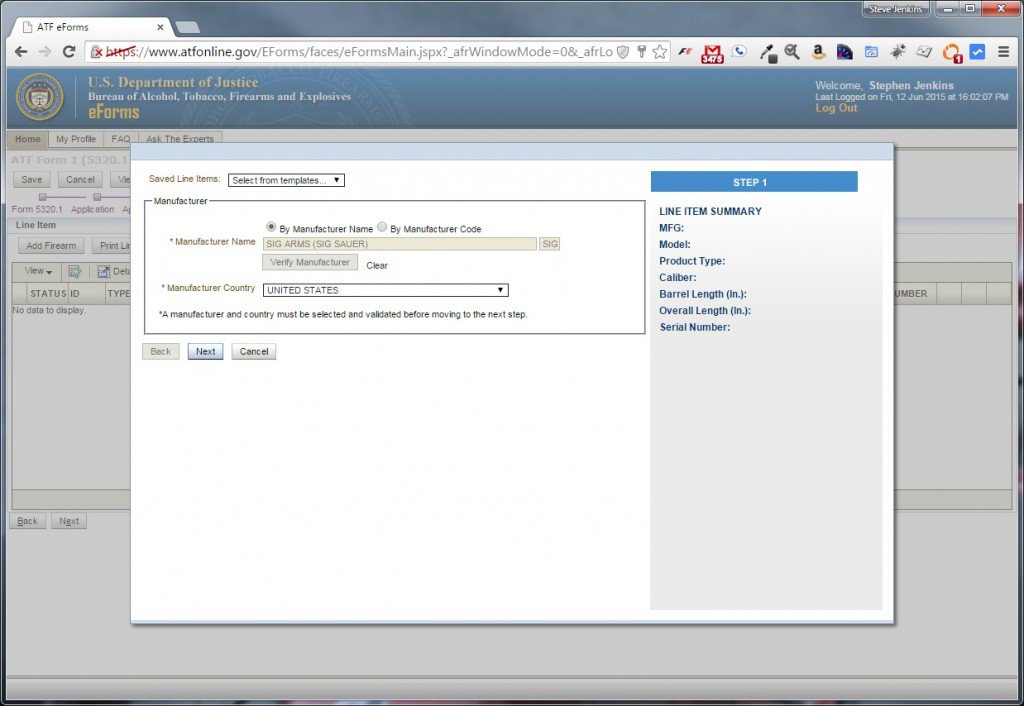
Select the correct Manufacturer Country
Press Next to move on to Step 2 of the Add Firearm box.
Step 4.3-2: Firearm Detail
In Step 2 of the box, you need to provide accurate details about the firearm, in the configuration as you want it to be registered. For example, if you’re like Joe and have an MPX in pistol configuration and you want to convert it to an SBR by doing nothing other than adding a stock, you’d want to provide the length of the existing barrel, but include the overall length of the weapon with the new stock. Or, maybe you want to put a shorter barrel on an AR-15 to shrink it down to SBR size, in which case you should include the length of the new shorter barrel, as well as the new overall length of the weapon in SBR configuration. Again, you’re telling the ATF details about the weapon as you intend it to exist after they approve it. As I said at the beginning of this post, there are many laws surrounding firearms, and most of them have very serious consequences if violated. It’s 100% YOUR responsibility to understand any and all laws that might apply to you before making any modifications to any weapons. I’m not a lawyer and I don’t play one on TV. Nothing in this post, comments, or anywhere else on this website should be construed as legal advice. Proceed at your own risk and peril. Always keep things 100% legal, and seek legal advice if you’re not sure what that means in your particular case. I’m trying to be helpful, but I’m not going to take any part of the blame if you decide to be an idiot and violate Federal firearms law.
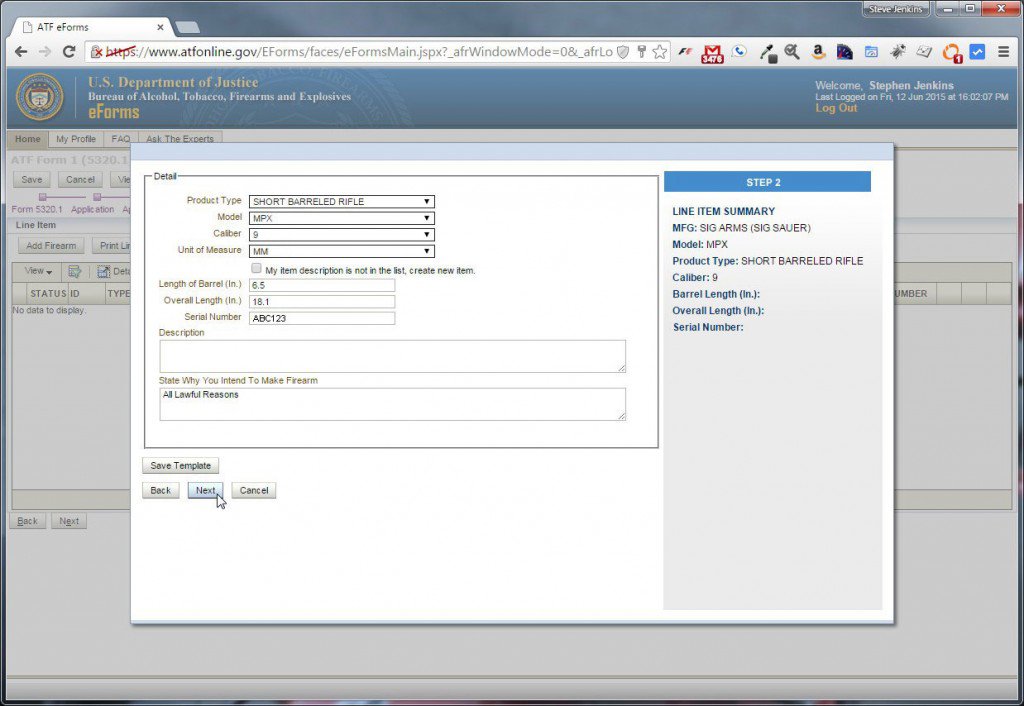
Add firearm details as you want it registered, and not necessarily as it is currently.
Joe is registering an SBR, so he selected “SHORT BARRELED RIFLE” from the Product Type drop-down box.
The Model drop-down is pre-populated with known firearms from the manufacturer (which you verified in the previous step). If your firearm doesn’t appear, don’t panic. If it’s an extremely new product, it’s possible that you’re the first person to attempt to register. That’s unlikely, but I’ve seen it, and it is possible. It’s more likely that you maybe chose the wrong manufacturer, so it might be worth going back and double-checking. If you’re certain everything’s right but your model’s not there, you can ignore the Model drop-down (for now) and select “My item description is not in the list, create new one.” You’ll have some extra hoops to jump through at the end of the form. But for the vast majority, your weapon will be there.
Assuming your item is there, select the correct Caliber (in Joe’s case “9”) and the Unit of Measure for that caliber (such as “MM”). If your weapon is a “5.56,” you should also select “MM.” If the weapon you’re modifying is a .40 cal, you’d choose “40” as the caliber and “CALIBER” as the unit of measure. Or, if you were creating a Short Barreled Shotgun, you’d likely choose “Gauge” as the unit of measure. Make sure you get this right, as the ATF will reject your application your form if they find any errors.
Put the Length of Barrel and Overall Length in inches in the configuration as you want the firearm registered. You can measure things yourself (make sure you know how to do this properly), or look on manufacturers’ websites under their specifications. According to the NFA, the barrel length of a shotgun or rifle “shall be determined by measuring the distance between the muzzle and the face of the bolt, breech, or breechlock when closed and when the shotgun or rifle is cocked” (see 27 CFR sec. 179.11). Overall length is defined as “the distance between the extreme ends of the weapon measured along a line parallel to the center line of the bore” (see 27 CFR sec. 479.11). On a folding stock weapon you measure with the stock extended, provided the stock is not readily detachable, and the weapon is meant to be fired from the shoulder. If you have anything attached to the end of the barrel (such as a flash suppressor, adapter, etc.) it can only be included in the barrel and overall length measurements if it is permanently installed — that means welded, pinned, etc. If you’re able to remove the attachment from the end of your barrel by hand or with hand tools, the ATF does not consider that “permanent.” But if the attachment requires cutting, drilling, grinding, or major heating to remove, you’ve got a pretty solid argument that it’s permanent.
The most accurate way to measure barrel length on a rifle or shotgun is how the ATF would do it if they inspected your firearm: remove any non-permanent attachments, make sure the firearm is unloaded and cocked, then insert a wooden dowel from the muzzle end until it stops on the bolt or breechface. Use a pencil to mark the muzzle end of the dowel where it exits the barrel, then remove the dowel and measure from the end of the stick to your mark. You now have an accurate barrel length measurement.
Again, this is friendly advice and I’m not an attorney, so making sure length information for your firearm is 100% accurate is your responsibility.
For Serial Number, include the existing serial number of the weapon from the manufacturer. If you’re creating a new weapon yourself from scratch, you’d be able to enter any serial number you want.
You don’t have to put anything in the Description box. I never do. Once again, this is also not a place where I recommend sharing your comedic genius with the ATF. For State Why You Intend To Make Firearm, I recommend putting simply “All lawful reasons.” I’ve heard stories where some applicants put things like “To fight zombies,” and actually got away with it… but again, I don’t think it’s worth risking $200 and a longer wait time to make jokes here.
When you’re done entering the details, double-check them before you press Next to go to the 3rd and final step of the Add Firearms box.
Step 4.3-2: Electronic Documents (NOT for Trust docs)
Step 3 of the Add Firearms box asks for Electronic Documents relating to the firearm. DO NOT ATTACH YOUR TRUST DOCUMENT HERE. In most cases, you won’t attach anything here. It’s primarily for attaching documentation about the firearm if you’re creating one from scratch. If you’re filling out ATF Form 1 using a trust, you’ll attach those docs later. Just press Finish to finalize and close the Add Firearms box.
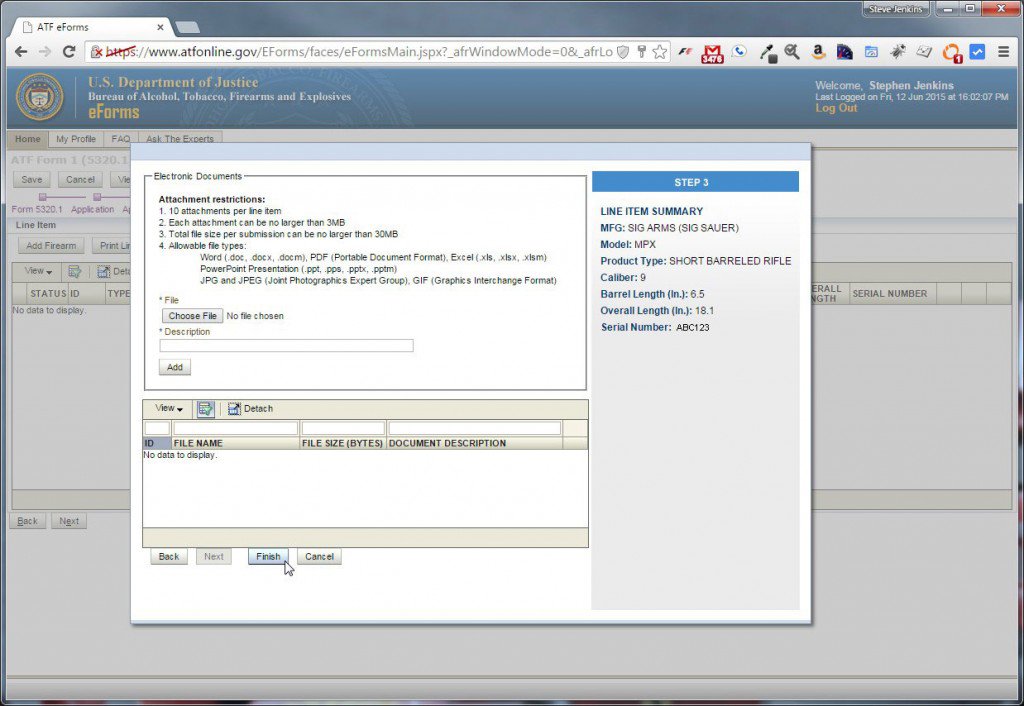
Don’t attach trust or corporate documents here. That comes later.
Once you’ve finished adding a firearm, the Line Item section will update and look like this:
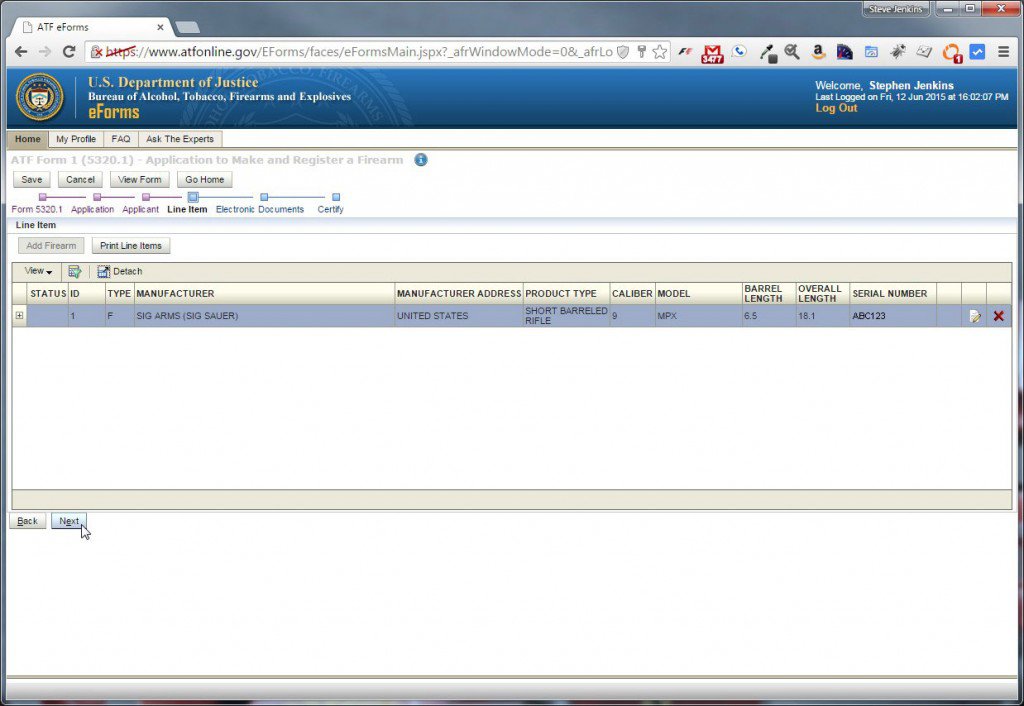
Line Item section with firearm added.
You can’t submit a Form 1 for more than one firearm at a time, so don’t even try. You should now see some of the details you just provided. Assuming everything looks right, you can press Next to move on to Electronic Documents.
Step 4.4: Electronic Documents
If you’re submitting this form using a Corporate Entity or Trust, this is where you’ll provide those documents to the ATF.

Electronic Documents section of ATF Form 1. This is where you upload your Trust documents.
Use the Choose File button to select the first document you want to attach, then select the document from your hard drive location. For Document Type, choose the appropriate type — which will most likely be “CORPORATION/TRUST/OTHER LEGAL ENTITY.” For the description, enter something that describes the document. I simply use “Trust.” Hit the Add button and the document will appear in the list of attached documents:

Electronic Documents section showing all attached docs.
If your legal entity has multiple documents (such as amendments to the Trust or corporate docs), follow the same process to add them here. Joe only has the one document, so he’s ready to hit Next and move on to the Certify step.
Step 4.5: Certify Section
One you arrive at the Certify section of ATF Form 1, the system will take a quick look at your form and point out any obvious errors, such as required information that’s missing. It won’t check for accuracy of the information, however. That’s done manually after your form is submitted.
If you are submitting a Form 1 for a manufacturer or model that wasn’t listed by the ATF, you’ll get a yellow warning message at this point that says “The model or manufacturer you have indicated is either “unknown” or is not listed in the ATF reference tables. ATF will have to validate the information you provided prior to rendering a decision on your application. This may extend the average processing time for this application. Please attach copies of any additional information that you feel will assist us with this validation.” You can continue on and ignore this message, or you might consider going back to the Line Item step and attaching a photo of the firearm, including a close-up of the serial number, manufacturer markings, and any other markings that might speed things up.
Otherwise, if everything looks OK up to this point, you’ll get a validation message like this:
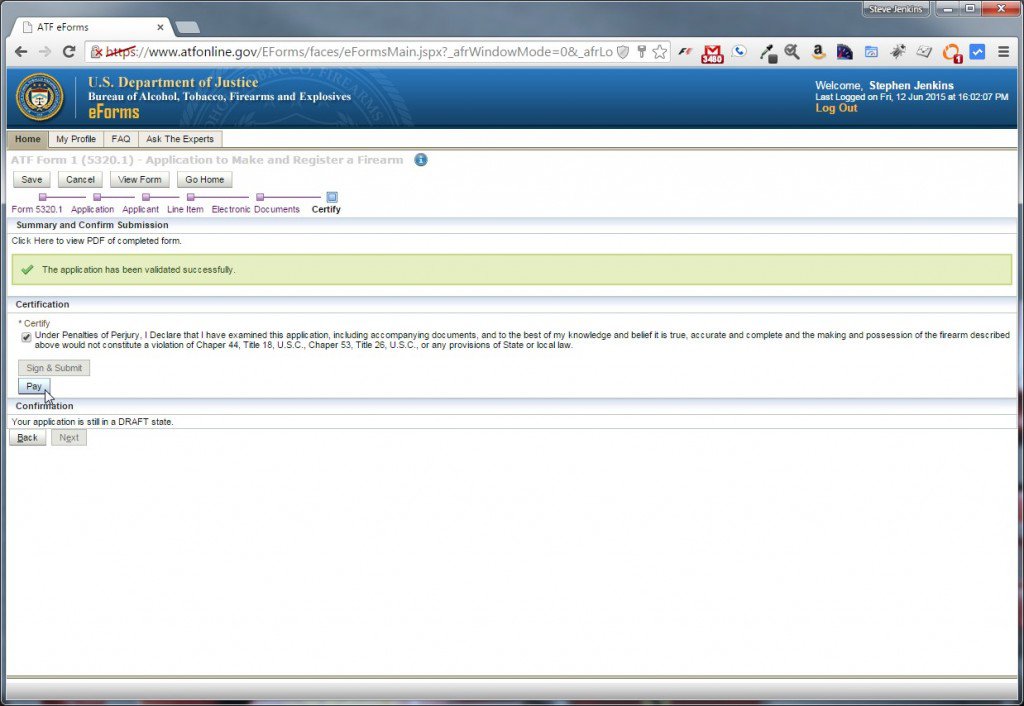
ATF Form 1 Certify Section
Read the Certification section carefully before checking the box, because by doing so you’re making an official declaration to a government agency, under penalty of perjury, that you’re providing true, accurate, and complete information. And the penalties for perjury are serious. Unless, of course, you’re a sitting U.S. President or Cabinet Member (how I wish that really was a joke).
Step 4.6: Pay, Sign, and Submit
After checking the Certify box, you’re ready to hit the most important button as far as the ATF is concerned: the Pay button. You’ll notice the Sign & Submit button is grayed out until this crucial step is completed. Of course, Constitutional strict-constructionists (such as myself) might have very strong opinions as to whether the requirement to pay an additional $200 to shorten a rifle or lengthen a pistol qualifies as “infringement” of the right to keep and bear arms, but that’s a discussion for another day. So for now, be a good little citizen, patriotically reach for your credit card, and press Pay. Your patriotism will be rewarded with the following dialog box:
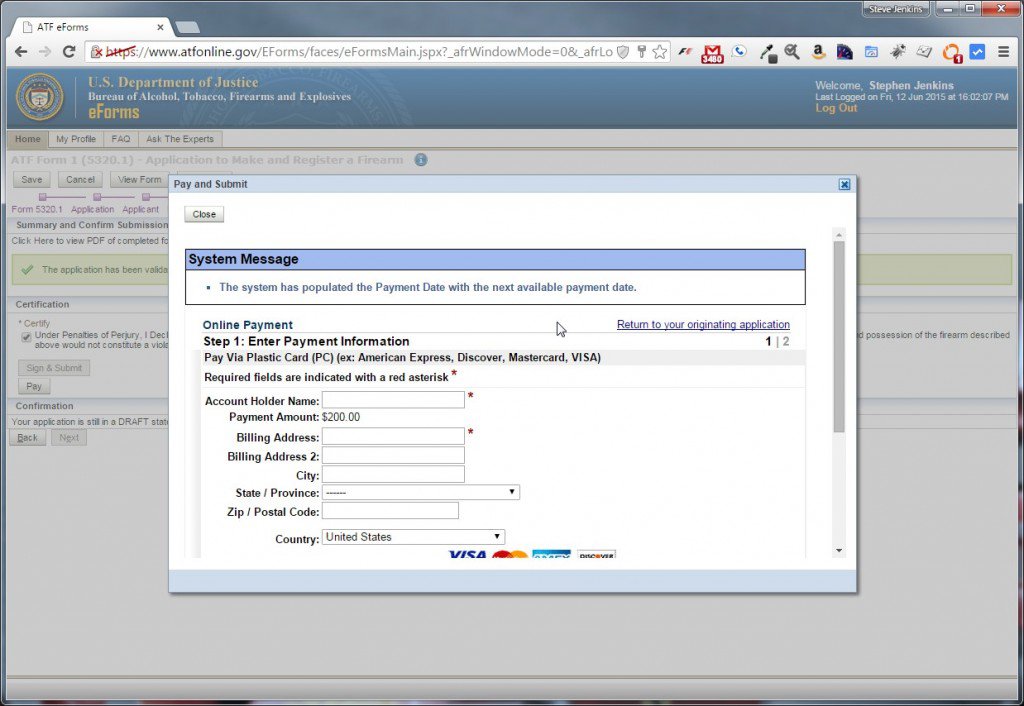
It’s time for Uncle Sam to get PAID!
Fill in all the required fields (“Account Holder Name” means the name as it appears on the credit card), then scroll down and make sure everything is filled out correctly.
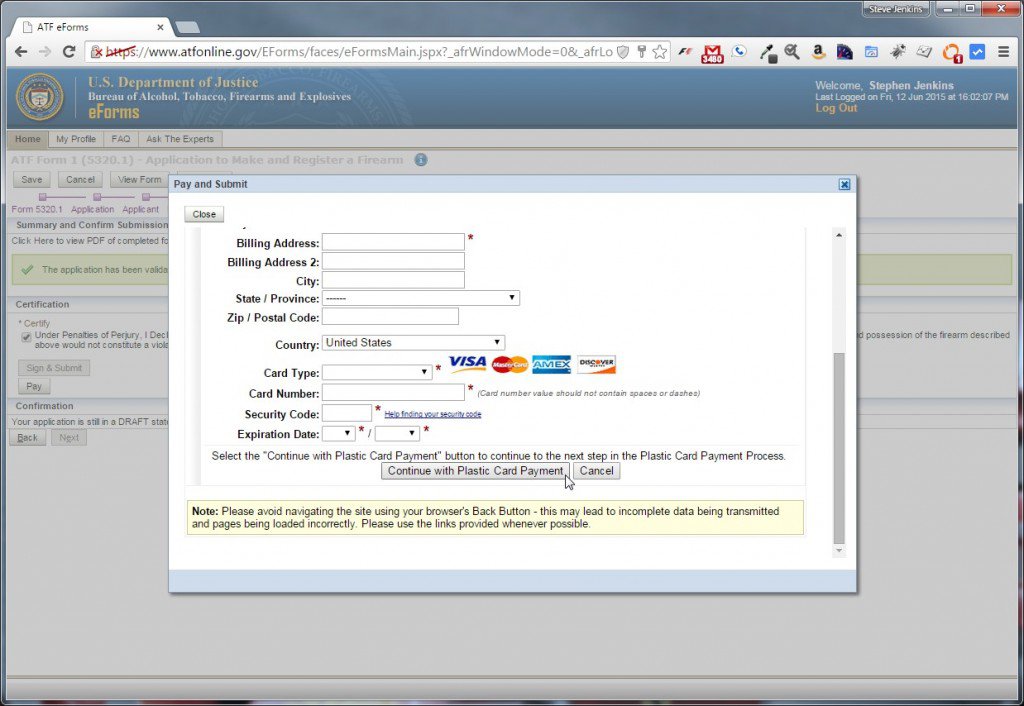
Uncle Sam gonna GET that money!
Once you’ve provided your credit card info, press Continue with Plastic Card Payment. You’ll see one more screen that allows you to enter an email address for a confirmation and receipt, and a check-box that authorizes the credit card charge:
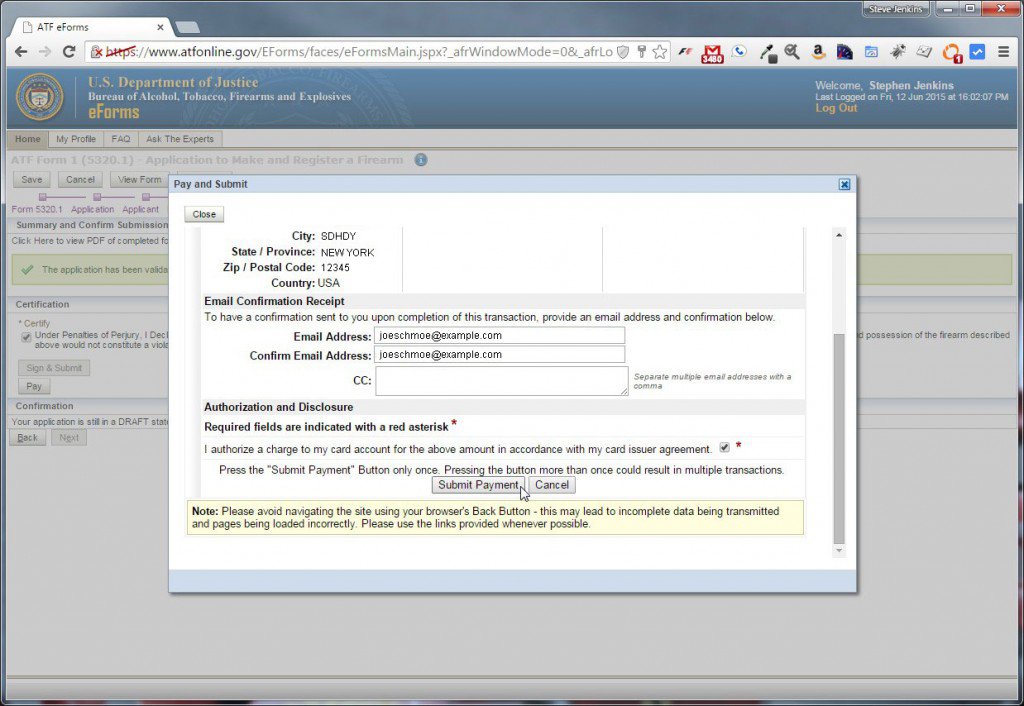
Enter your email address if you want a receipt.
Hit the Submit Payment button and wait patiently. Don’t press your browser’s back button. Eventually, you’ll get a payment confirmation:
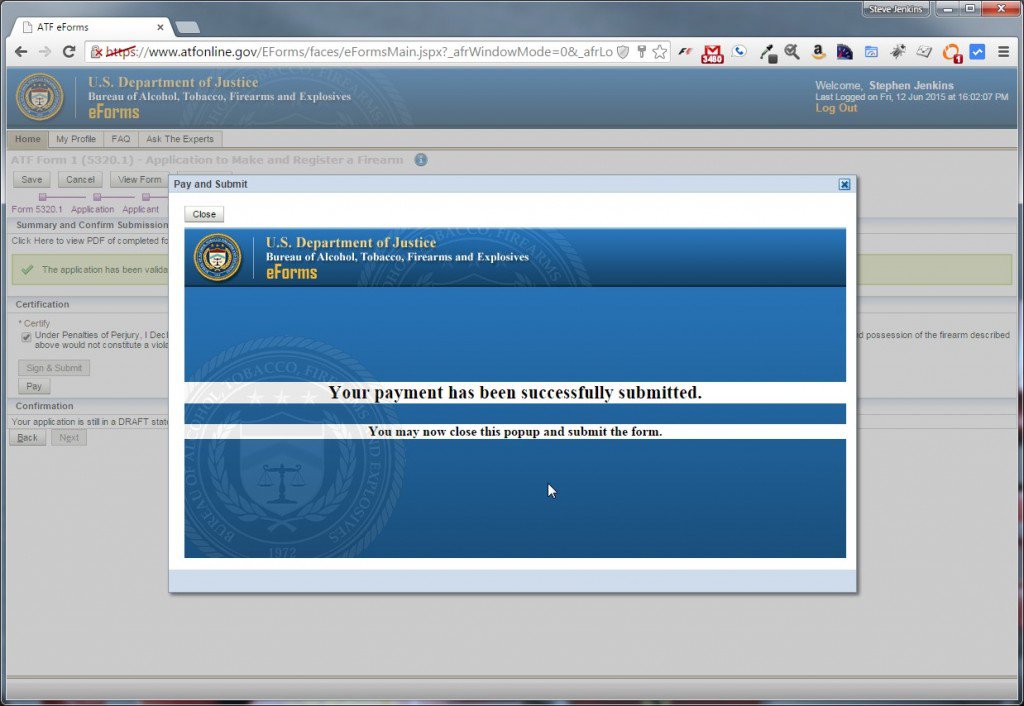
Uncle Sam GOT THAT MONEY!
At this point, you’ll be returned to the Certify page and the Sign & Submit button will no longer be grayed out. Before pressing it, pause for a moment to soak in the Freudian irony of the wording, and then… submit. 🙂

The ATF wants you to submit to them.
You’ll be asked to verify your 12+ character password:
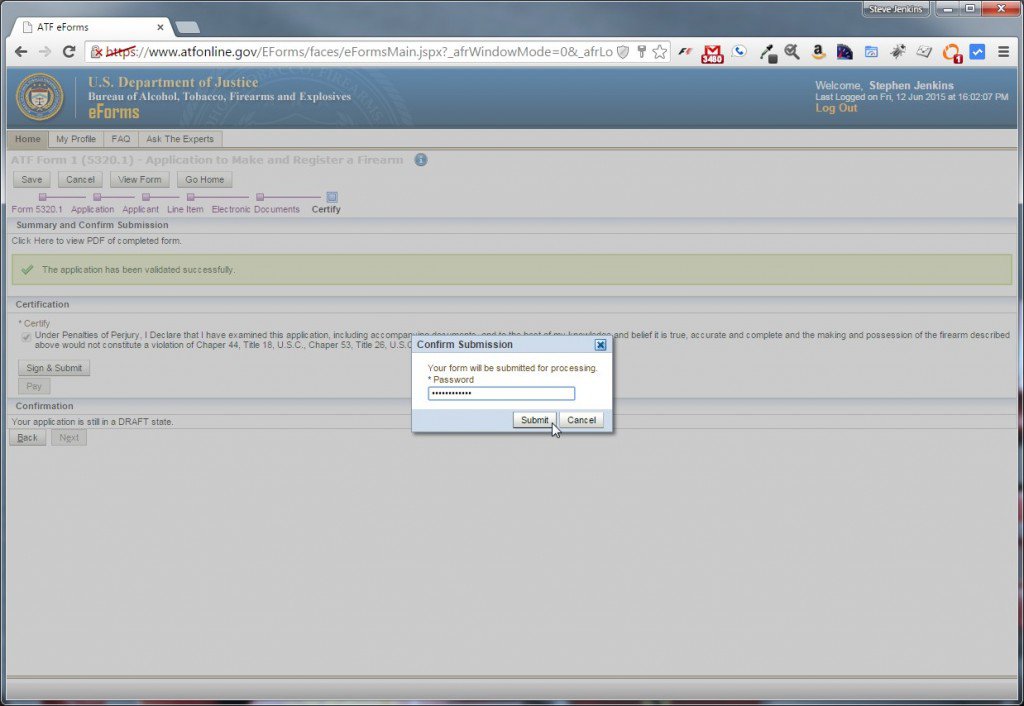
Enter your password one last time.
You’ll receive a pop-up verifying that you’ve successfully submitted to the ATF, and you’ll be rewarded with an application number for your reference (which you’ll need if you want to call the ATF about it later):
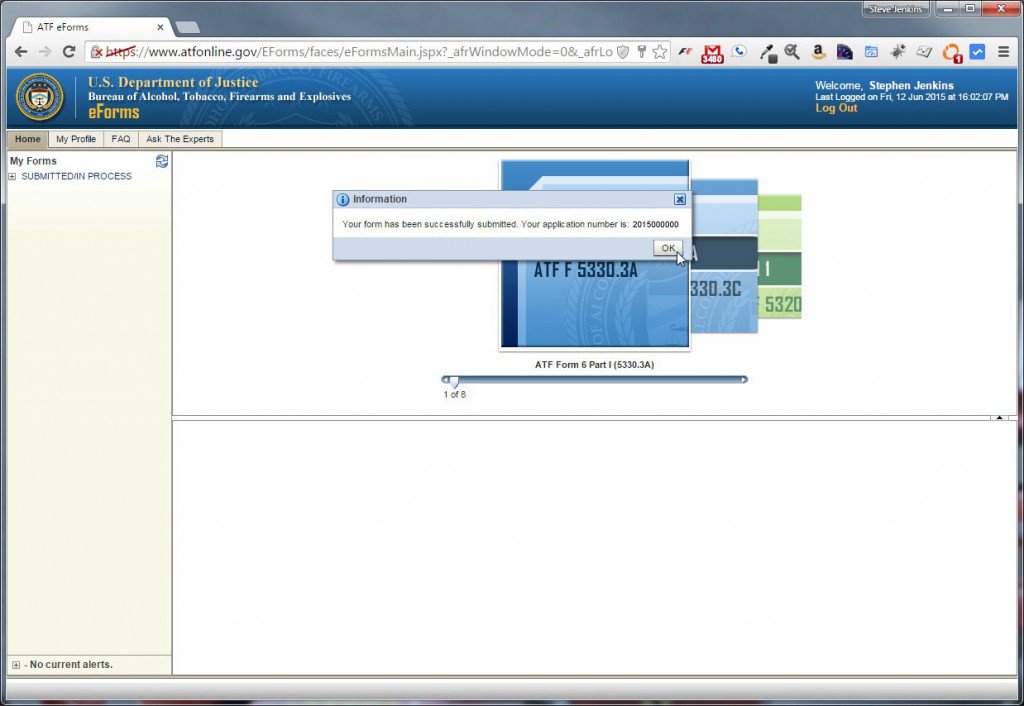
Verification that you’ve successfully submitted to the ATF.
Step 5: Wait
With your ATF Form 1 e-filed, the only thing left to do is wait. Depending on their backlog, it could be weeks, or it could be months. Check your email inbox right away, though, because if the system worked properly, eForms should have sent you an email confirmation. This same system is supposed to email you any time the status of your application changes (though it’s not 100% reliable). Your initial email confirmation should look something like this:
Date: Fri, 12 Jun 2015 16:59:15 -0400
From: [email protected]
To: [email protected]
Subject: eForms Application Submission Notification for Permit/Control No: 2015000000

This is to advise you that the status of your eForms submission with the subject Permit/Control number has changed to SUBMITTED/IN PROCESS

Permit/Control No: 2015000000
Your Reference No: Sig Sauer MPX
Submission Date: 2015-06-12-04:00
Form ID: ATF Form 1 (5320.1) - Application to Make and Register a Firearm

Please logon to the eForms site for more details.

If you have any questions about your eForms submission, please contact:
for Imports questions, call (304) 616-4550
for NFA questions, call (304) 616-4500
for AFMER questions, call (304) 616-4590
for Firearms Licensing questions, call 1-866-662-2750

Thank you for using eForms.
You can also go back to the eForms Home tab to check on your submission. An item called Form 1 should be listed under the My Forms section under SUBMITTED/IN PROCESS. If you click on it, you can view the submitted form, but you can’t edit it.

You can check on your form’s status here.
If you have questions about your application, you can contact the NFA division of the ATF by calling (304) 616-4500 during Eastern time zone normal business hours. You can also use the Ask the Experts tab in the eForms interface to email your question. I’ve found their response time to questions surprisingly quick.
Eventually, you should hear back from the ATF. In theory, they’re supposed to send you an email when they approve or reject your application, but they’re a government agency, so that doesn’t always happen. It’s best to check the eForms site occasionally if you have a submission pending. When you do come back to check, you don’t have to drill all the way down into the form. If the ATF has made a decision, your Form will be moved from “SUBMITTED/IN PROCESS” to “APPROVED” or “DISAPPROVED” in your My Forms area:
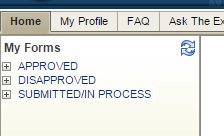
Approved and Disapproved submissions are shown in your My Forms area.
Keep in mind that this section (like anywhere else on the eForms site) can get “buggy” from time to time. I recently had a submitted form completely disappear from my account’s My Forms section. I called the ATF’s NFA division to make sure they still saw it, and everything was fine on their end. The form magically re-appeared in my account a day later, still shown as “SUBMITTED/IN PROCESS.”
If your Form 1 Gets Rejected
If the ATF rejects your Form 1, they’re supposed to include a written explanation with the reason(s). They’ll also automatically refund your $200 within a week or so of the rejection. If you decide to re-submit a corrected application for the same firearm, use the Ask the Experts feature on the eForms website to provide your old and new application numbers (they call them “control numbers”). The ATF will process the new application as a “correction,” which should take less time.
If your Form 1 Gets Approved
If your application gets approved, download the PDF file to your hard drive. Print out a couple copies, too. Store one with your trust documents (preferably in a safe), and keep the other one in your gun bag. Whenever you take your Form 1 firearm anywhere to shoot, you should bring a copy of your approved Form 1 showing the tax stamp… just in case you come under any scrutiny.
Also, if you used a Corporation or Trust, don’t forget to engrave the entity’s name on the firearm properly. Use your new firearm in good health… and with good sense. 🙂
If the ATF Contacts You
If you included contact information (such as your email and/or phone number), the ATF may try to contact you if they have questions while reviewing your submission. If that happens, I recommend you be courteous and friendly, just as I’ve always found them to be. The person you’re talking to on the phone doesn’t make the laws, and they’re just trying to do their job.
Good luck with your ATF Form 1 endeavors, and feel free to tell me in the comments below how your experience went! Joe’s still waiting… but he’s patient and optimistic. 🙂
As always, I welcome your questions, comments, and feedback below.
Further Reading
- ATF.gov – get info straight from the horse’s mouth… guaranteed to be accurate for at least 5 minutes before they change their mind 😉
- eFormsNews – A PDF published by the ATFin January 2015 that has a lot of useful information for eForms users.
- Understanding ATF e-Forms – SilencerShop.com
- How to legally own a Short Barrel Rifle – Defense Firearms Blog
- GunTrustLawyer.com – A respected source of online gun trust info