Why would you want a dehumidifier in your gun safe, gun vault, or workshop? For the most part, guns are made of metal. Even the popular “polymer guns” like Glocks aren’t made entirely of plastic; the barrel, springs, and many of the inner workings of the action are still made of various metals. When properly caring for a firearm, protecting those metal elements is crucial… and one of the biggest enemies is moisture, which can rust and corrode finishes and internals.
In-Safe Dehumidifiers
Many gun owners use various dehumidifier products in their gun safes to help inhibit corrosion. One of the most popular is the Eva-Dry E-500, which I use in my own safe:
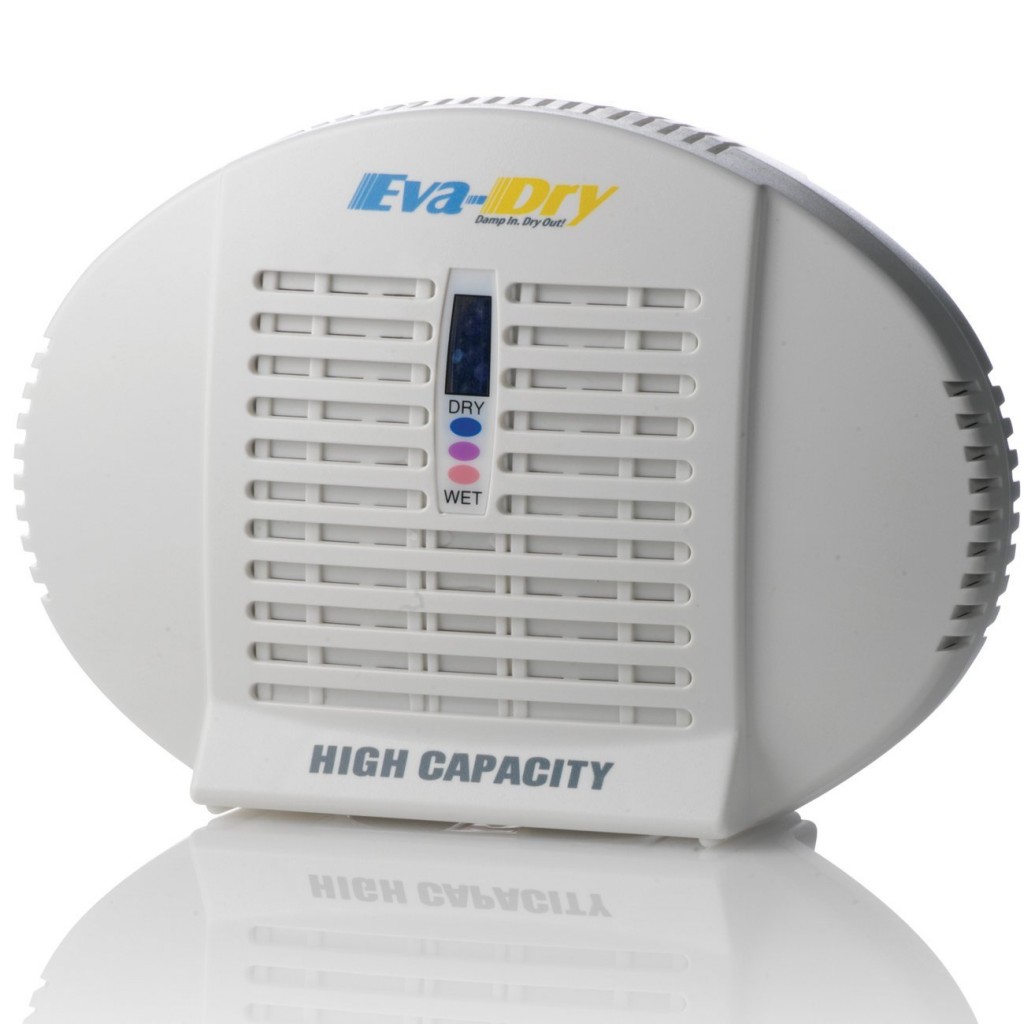
Eva-Dry E-500 Mini-Dehumidifier
For around $25, the Eva-Dry is a no-brainer. Most serious gun guys I know have one, or something like it. It’s filled with small “beads” that are blue-colored when dry. As they absorb moisture around them, the beads turn pink — indicating that it’s time to plug the unit into a wall-outlet overnight, which heats up the beads, thereby drying them out. When the beads are blue again, you stick the unit back in your gun safe, and it starts absorbing moisture again.
But there are problems with this approach. The first is that depending on the relative humidity in the area around your gun safe, you might have to “recharge” the beads every week. If you forget to do so, your guns are unprotected until you remember. It’s a bit of a hassle to remember to check the Eva-Dry, then remember to come back and unplug it from the wall to put back in the safe the next day. I’ve forgotten on more than a few occasions.
Thinking Bigger
After a leaky toilet valve led to me borrowing a whole-room dehumidifier from a neighbor to dry some carpet, I started to think about how effective such a unit would be in a gun vault, or in a workshop like mine where my gun safe is stored. My workshop is part of what was initially designed to be an indoor gun range, so it’s got thick concrete walls and no windows. A digital locking system keeps the entire room secure, so it’s not uncommon for me to leave disassembled firearms on my workbench… usually waiting for parts to arrive. That’s is another reason I wanted to dehumidify the entire room; so that firearm parts on my workbench could also have some additional protection against moisture in the air.
After a little online research, I decided to give order the #1 best selling dehumidifier on Amazon: the Frigidaire FAD704DWD. It’s Energy Star compliant (more on that later), has a 70-pint storage capacity before it needs to be emptied, auto-shut off, tank full alarm, and the ability to set a precise target humidity for the room. Its MSRP is $299, but you can find them for just over $200 on Amazon. I figured I’d give it a shot, and return it if I didn’t like it.
Testing the Frigidaire FAD704DWD
When evaluating this unit, I cared about three things:
- Would the unit lower the humidity in the room?
- How much would it cost in electricity to maintain my desired room humidity?
- How often would I have to empty it, and how easy would that be?
To answer the first question, I decided to use one of my decommissioned first-gen ecobee Smart Thermostats, which is ironic because one of my popular blog posts is about how to wire an ecobee to a whole house humidifier. I’ve since upgraded to the ecobee3, so I had a couple of first-gen units lying around. If I could power the ecobee thermostat externally, I’d be able to attach it to the local WiFi network. Even though it wouldn’t be connected to an HVAC system, it would still measure temperature and humidity over time, store that info on ecobee’s servers, and allow me to remotely access real-time humidity information with my mobile phone.
To power the thermostat (which I was now primarily interested in using as a humidistat), I used 12VDC 1Amp wall adapter (also from Amazon). I placed my new “smart humidistat” on top of my gun safe (forgive the lighting in the photo):
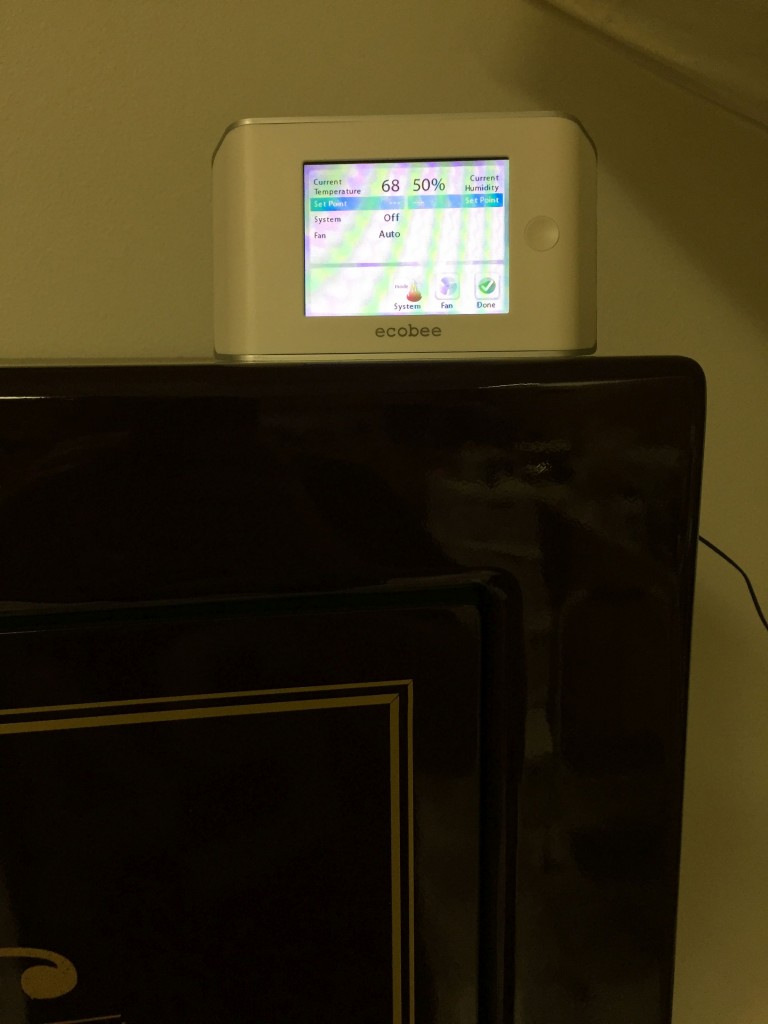
A decommissioned ecobee Smart Thermostat makes a great digital humidistat
As you can see from the above photo, the starting relative humidity in my workshop for this experiment was 50% on Saturday evening at 6:25 PM. I just happen to have another ecobee Smart Thermostat in my gym (which runs the basement HVAC), and since the gym is only one room away from the workshop, the data from the gym ecobee will be a good reference as a non-dehumidified room to measure the true effectiveness of the Frigidaire dehumidifier over the same time period.
Turning on the Dehumidifier for the First Time
With my humidity testing method all set, it was time to fire up the Frigidaire. I placed it on the floor, plugged it into a wall outlet (the instructions are very clear that you should not use it with an extension cord), and pressed ON-OFF. The unit whirred to life:
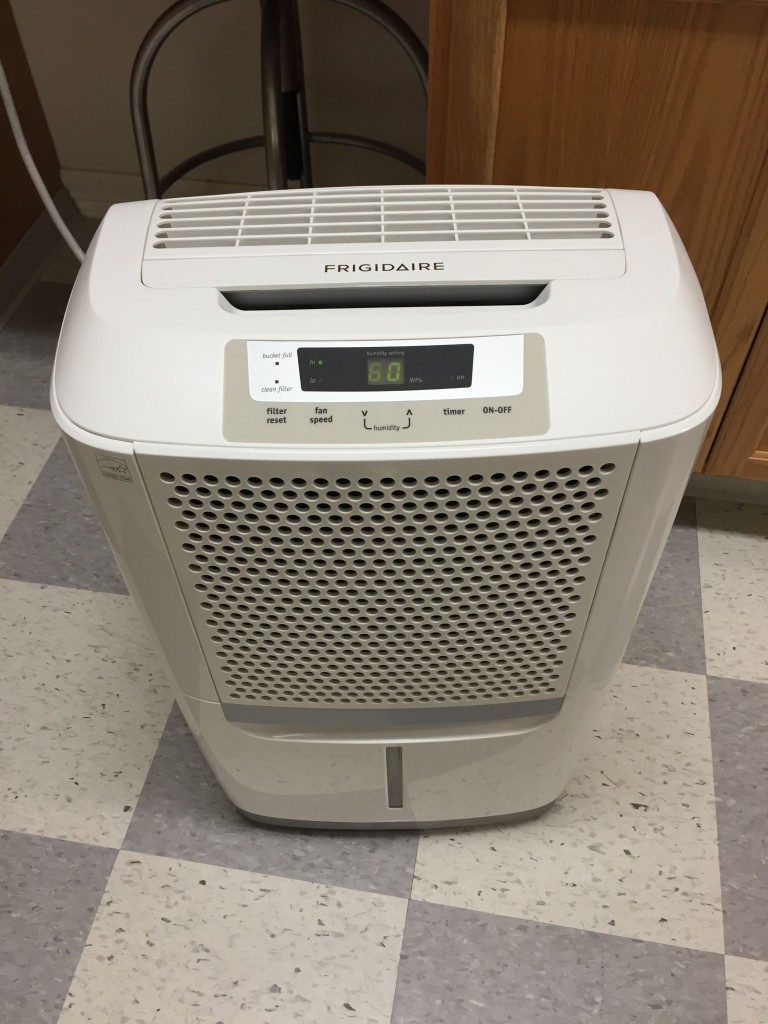
Frigidaire dehumidifier turned on
The round holes on the front are where the unit sucks air in, and the vents on top are where it blows dehumidified air out. There’s a retracting handle on top (the part with the “FRIGIDAIRE” logo) and wheels on the bottom to make moving the dehumidifier easier.
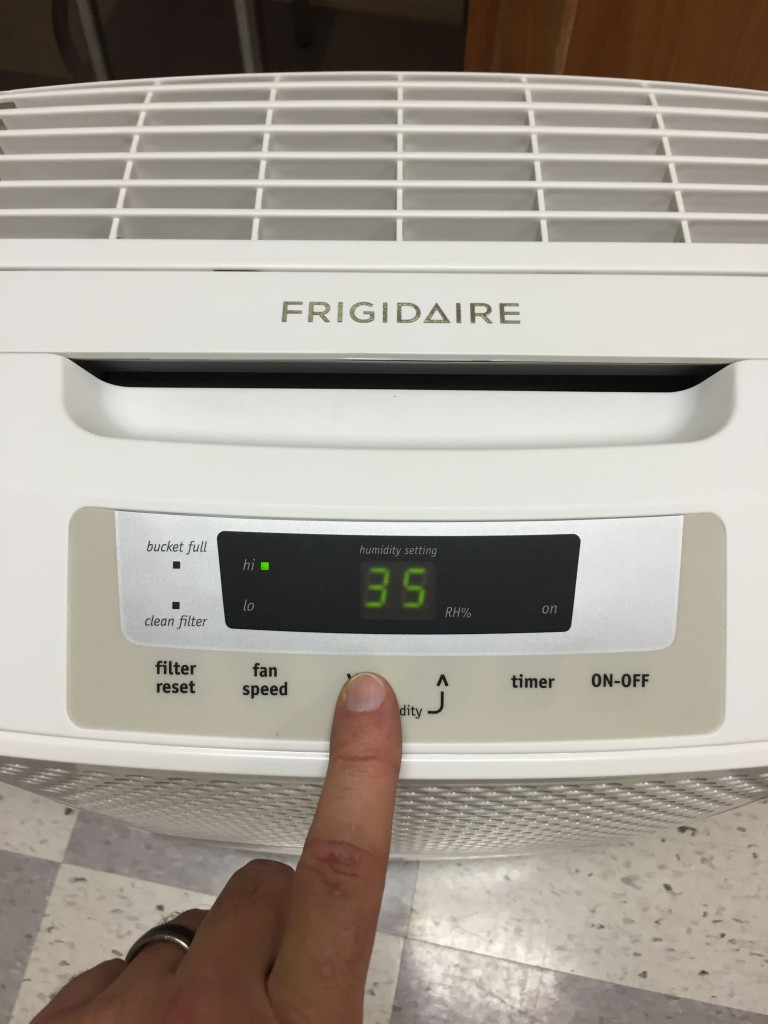
The user interface is simple. From right to left, you get buttons for ON/OFF, a timer button to delay when it turns on or off (from 30 mins to 24 hours), up/down arrows for choosing the desired humidity, fan hi/low, and a button for resetting the filter cleaning warning timer (which comes on after 250 hours of operation). A “bucket full “indicator and a “clean filter” indicator warn you when it’s time for some human intervention. The unit does shut itself off if the water level in the bucket (which can be viewed through that narrow vertical near the bottom of the unit) reaches “full.”
You can choose RH% (relative humidity) set points in “fives” (60, 55, 50, 45, etc.) all the way down to 35%:

Choosing an RH set-point of 35%
Or if you want the unit to run continuously, go one more click down from 35% to “CO,” which stands for “continuous operation:”
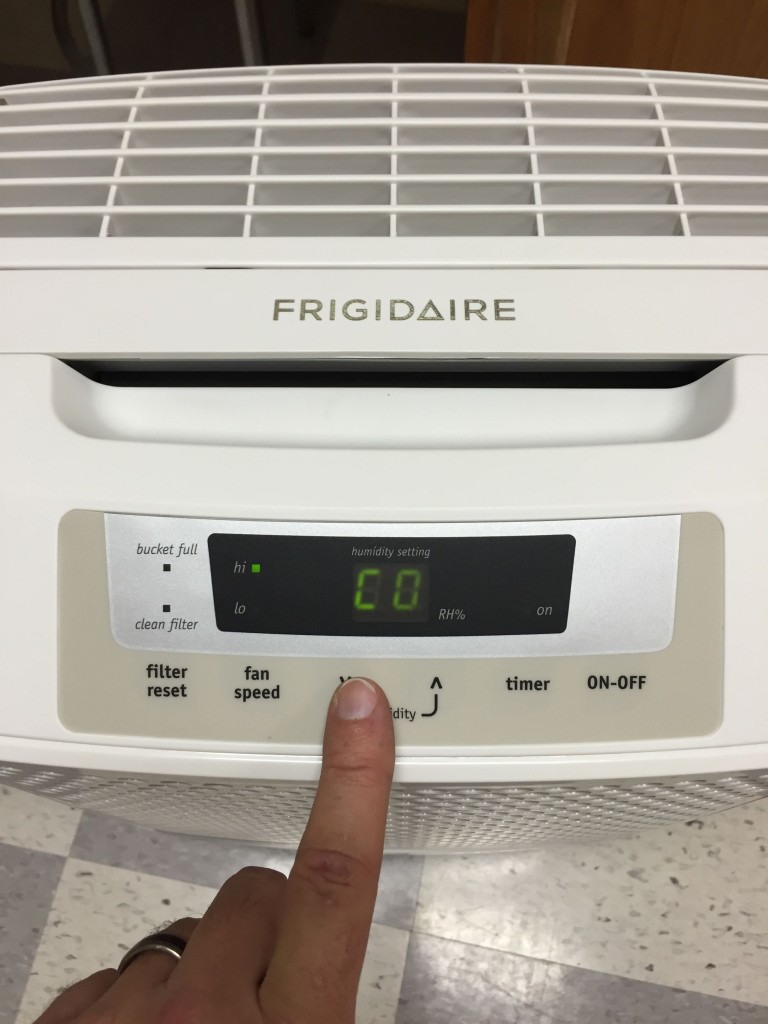
Continuous operation setting
Not knowing how dry the room could get, that’s the setting I chose for the initial test.
Dehumidifying Results
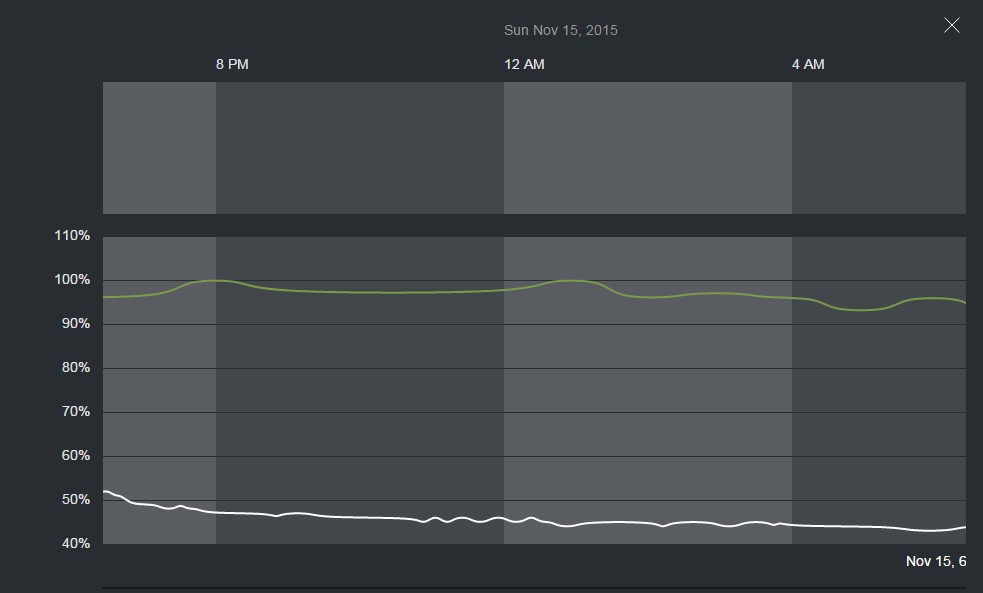
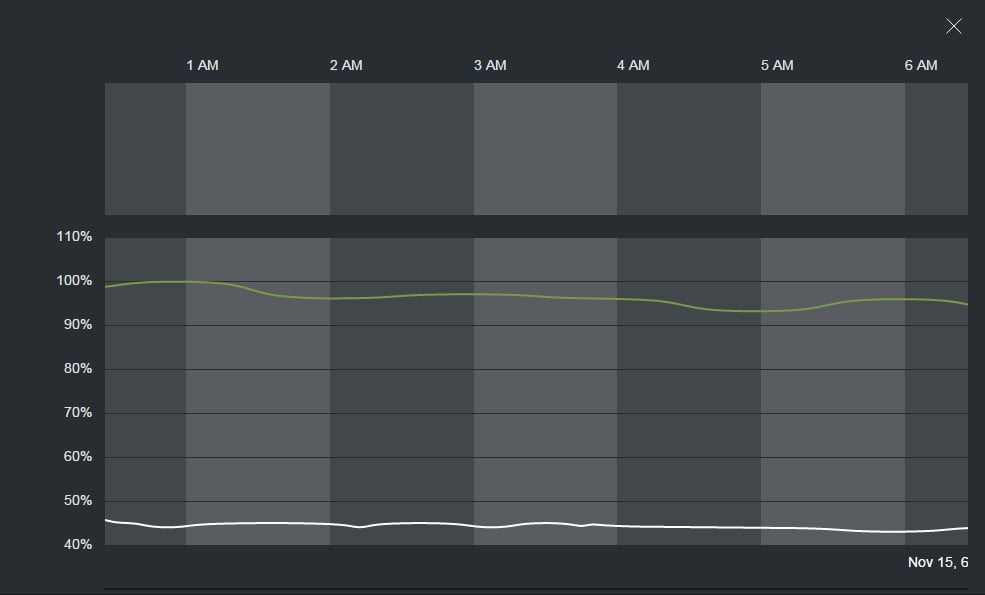
As for how well the unit did it’s job of drying the air in the workshop, I’ll let the ecobee graphs do the talking. The graphs below show exterior humidity (as reported by the National Weather Service) as the green line. The white line shows the humidity measured by the thermostat in the workshop. Each graph shows a 12 hour period, starting at 6:25 PM on Saturday Nov 14th (when I first turned the dehumidifier on) through 6:25 AM on Monday Nov 15th:
Data from Saturday 6:25 PM to Sunday 6:25 AM
Data from Sunday 6:25 AM to 6:25 PM
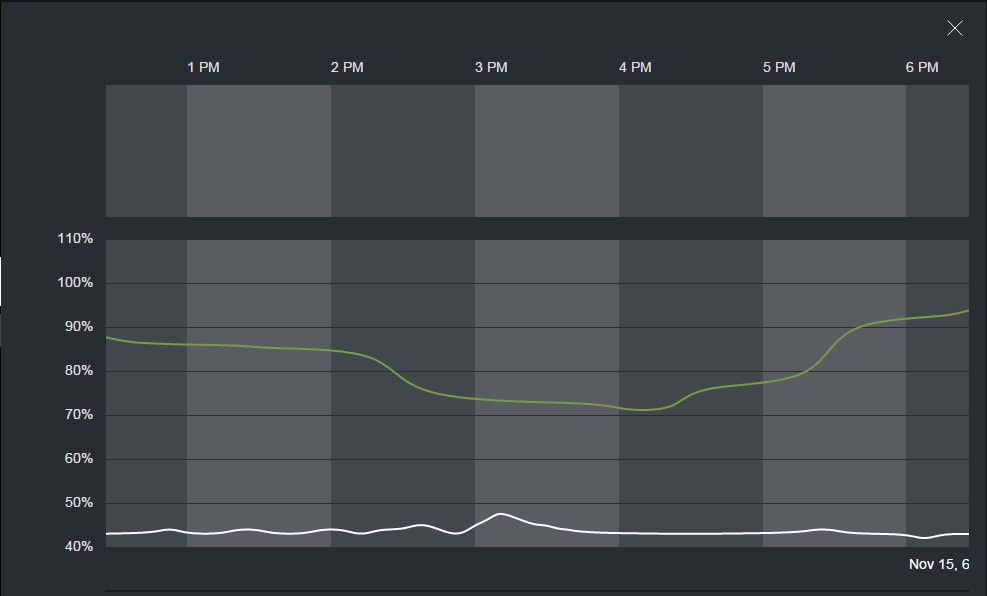
Data from Sunday 6:25 PM to Monday 6:25 AM
As you can see from the graphs, the dehumidifier wasted no time getting to work. Within six hours, it had already dropped the humidity from 50% to 45%. By 6 AM, it was 43%. By comparison, the gym thermostat one room away has shown almost a perfectly constant 50% over the same period of time.
You can see some upward “blips” in the third graph on Sunday afternoon, which was me opening the door to the workshop. Apparently I left the door open a little too long around 3 PM, but once I closed it again, the dehumidifier got right back to work.
It’s now Monday afternoon, and the current relative humidity in the workshop (which I can check with the ecobee app from my mobile phone) is right at 40%:

Checking the workshop’s humidity from my mobile phone
The humidity shown in the gym at the same time is 48%, so it seems that the unit is doing what it’s supposed to: keeping the workshop dryer than the rest of the house.
Testing Energy Efficiency
When purchasing an electric device designed to run 24/7 (or close to it), it’s important to understand how much that device will increase your electric bill. The Frigidaire unit I chose is “Energy Star Compliant,” meaning it’s supposed to meet certain Federal standards for efficiency. I do like the fact that you can pick a desired set point so that the unit can turn off once it gets there, then start up again automatically when the humidity rises.
To measure exactly how much electricity the dehumidifier was using, I grabbed my trusty Kill-A-Watt. If you don’t have one yourself, I high recommend picking one up for around $18. It’s a handy device that lets you measure the power usage of any device connected to it, as well as the quality of the voltage and frequency at your outlet.
When the Frigidaire unit is dehumidifying, it runs a compressor at a set speed, and operates the fan at “Lo” or “Hi,” depending on your setting. That means there are four different possible energy usage settings:
- Lo Fan only
- Hi Fan only
- Compressor + Lo Fan
- Compressor + Hi Fan
For pretty much the entire test, I ran my unit on “Continuous Operation” (compressor always running) with the fan on “Hi.” This represents the maximum humidification, but also the maximum power usage.
Lo Fan only consumed 55.7 Watts, slightly less than a 60W light bulb:

Lo Fan only
Hi Fan only was only slightly higher at 63.8 Watts:
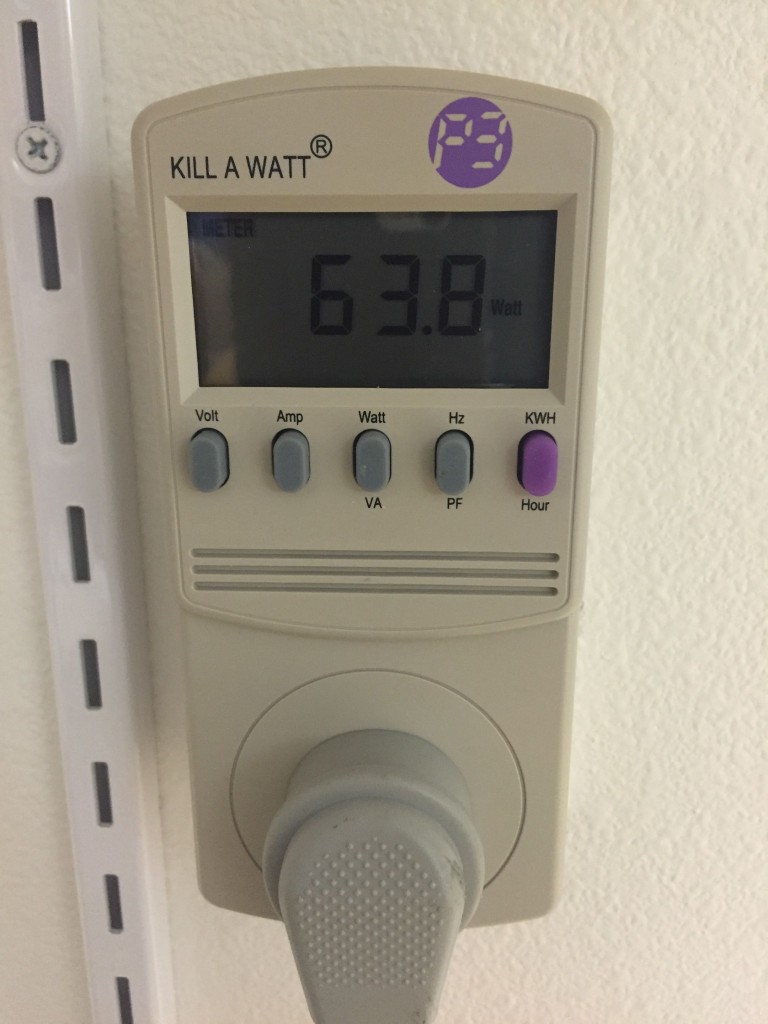
Hi Fan only
Running the compressor and Lo Fan made the usage jump to 357 Watts:
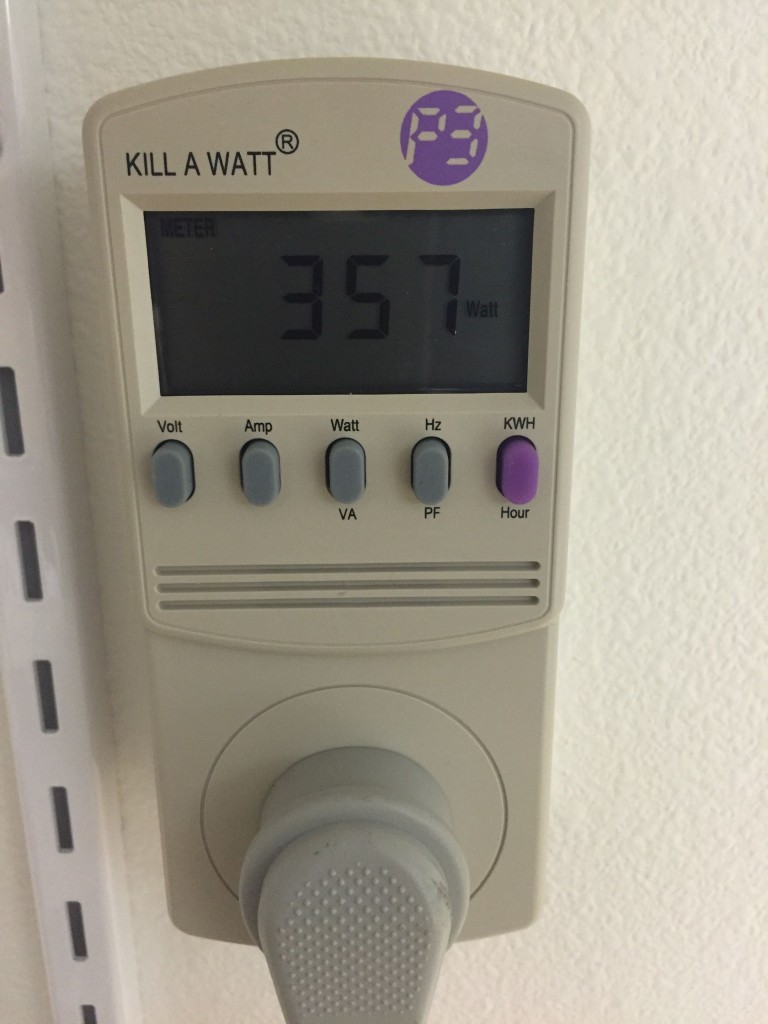
Compressor with Lo Fan
And compressor with Hi Fan was the highest (as expected) at 377 Watts:
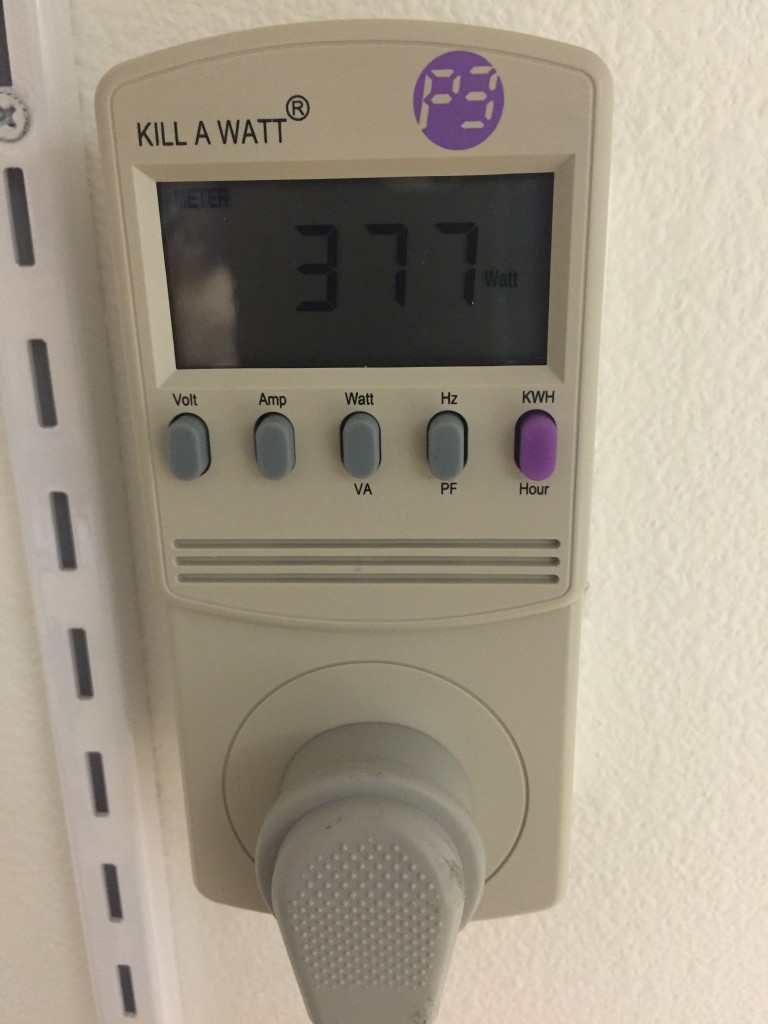
Compressor with Hi Fan
One of the best features of the Kill-A-Watt is its ability to track kilowatt hour usage. I kilowatt hour (or kWh) is roughly equivalent to 3.6 megajoules, and is the unit your power company uses to bill you. How much they bill you per kWh should appear on your bill, or you can look it up on their website. Puget Sound Energy in Seattle (where I live) charges $.088594 per kWh for the first 600 kWh of each billing cycle, then $0.107172 per kWh for the rest. To make the math easier, we’ll assume that I’m always going to hit 600 kWh every month (a safe bet) so we’ll price out the dehumidifier’s usage at 10.7 cents per kWh.
My Kill-A-Watt told me that after 4 hours of continuous use:
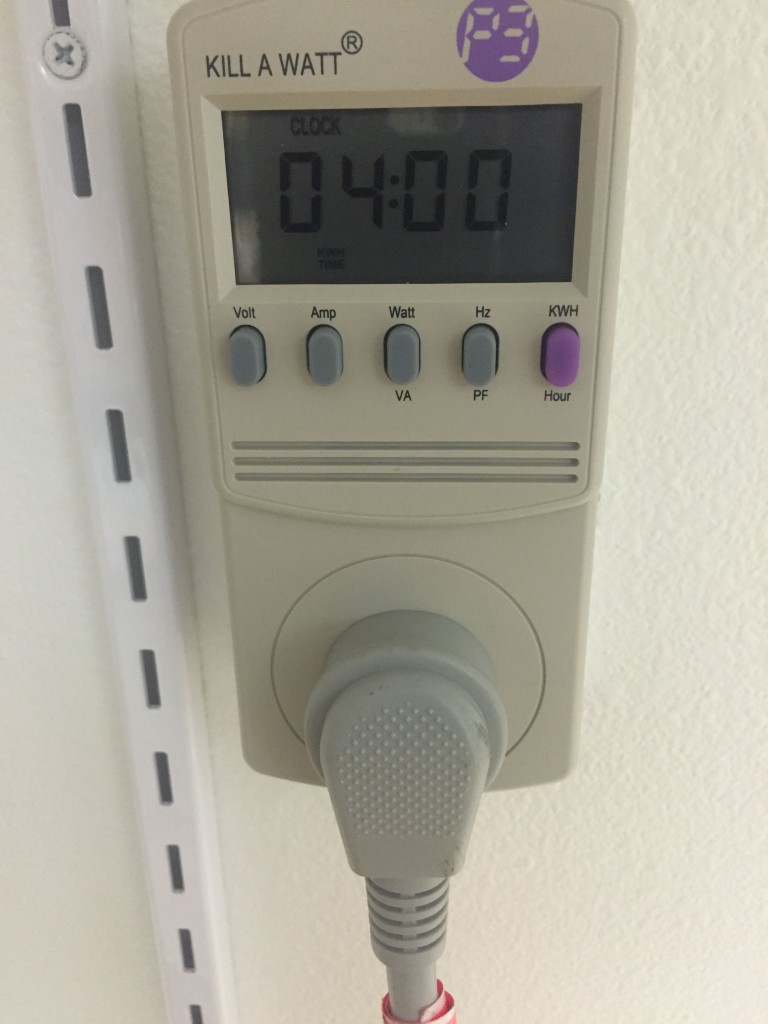
The Kill-A-Watt showing it has been measuring for 4 hours
…it had seen a total energy useage of 1.45 kWh:
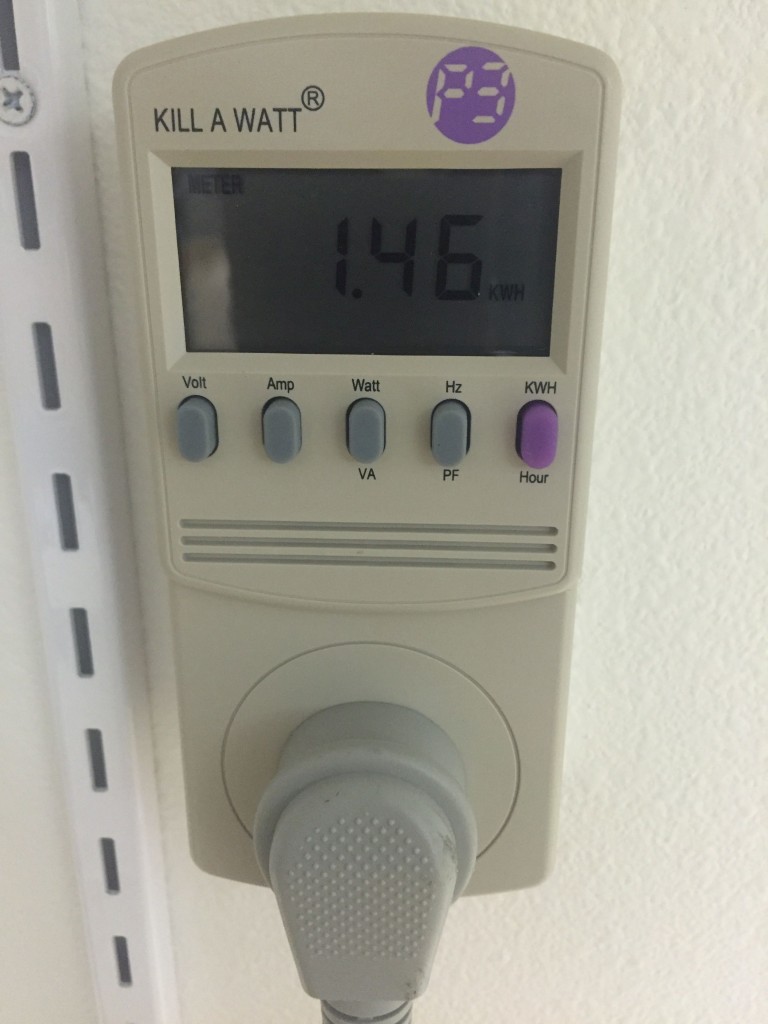
1.46 kWh of usage after exactly 4 hours
1.46 in 4 hours equals 8.76 kWh in 24 hours. Multiply that by 10.7 cents and it works out to just under 94 cents a day. So even if I ran the dehumidifier full-time at the most power-hungry setting, it will cost less than $1 a day (keep reading, however, to see why it will actually cost me less than 65 cents per day).
Emptying the Bucket
Remember the third thing I cared about with a dehumidifier is how often I’d have to empty it, and how difficult/annoying/inconvenient that would be. My bucket was almost half-full about 24 hours into the test:
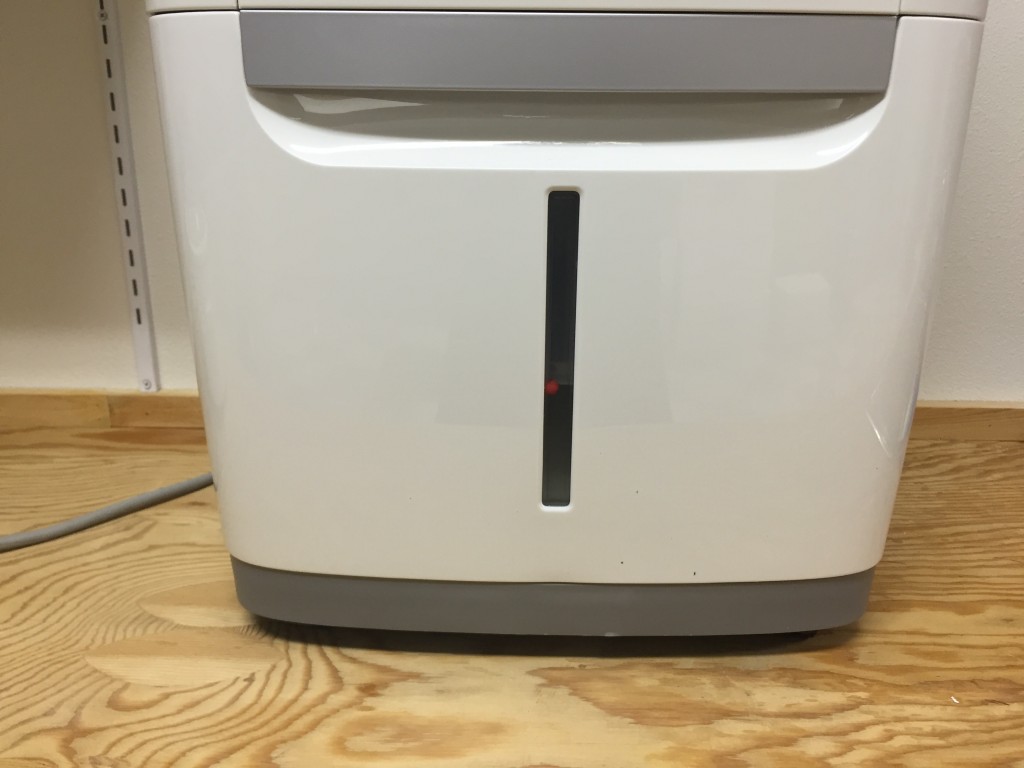
A red float shows how full your bucket is
That meant that I’d have to empty the bucket every 2-3 days. The unit automatically shuts off when it’s full, which is a good thing… but I already knew that would get real old, real quick.
Luckily, this Frigidare dehumidifier comes with a rear drain, which allows you to attach any garden hose connector and drain condensation without ever hitting the bucket. The only caveat is that the drain is gravity fed, meaning the drain port on the back of the unit has to be higher than the exit end of the hose. To make that possible, I moved the dehumidifier up onto my workbench.
I suppose I could have simply run a hose into the nearby sink… but I decided to get a little fancy. I hit the hardware store and bought some clear tubing (so I could see the drained water), a brass garden hose fitting, two clamps, and a new drain tail with a barbed hose fitting out the side.
I attached the garden hose fitting to the dehumidifier’s rear drain and clamped one end of the clear tubing:
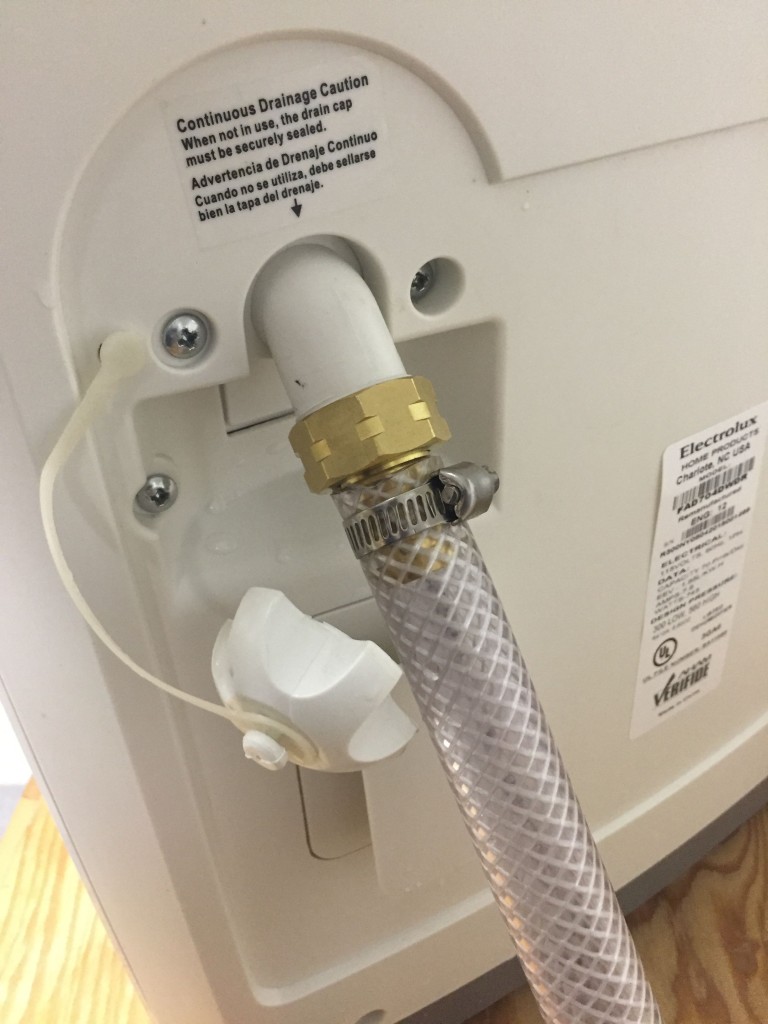
Attaching a drain hose to the dehumidifier
Then I removed the soap dispenser (which I never use) from my workshop sink and threaded the hose through the hole:
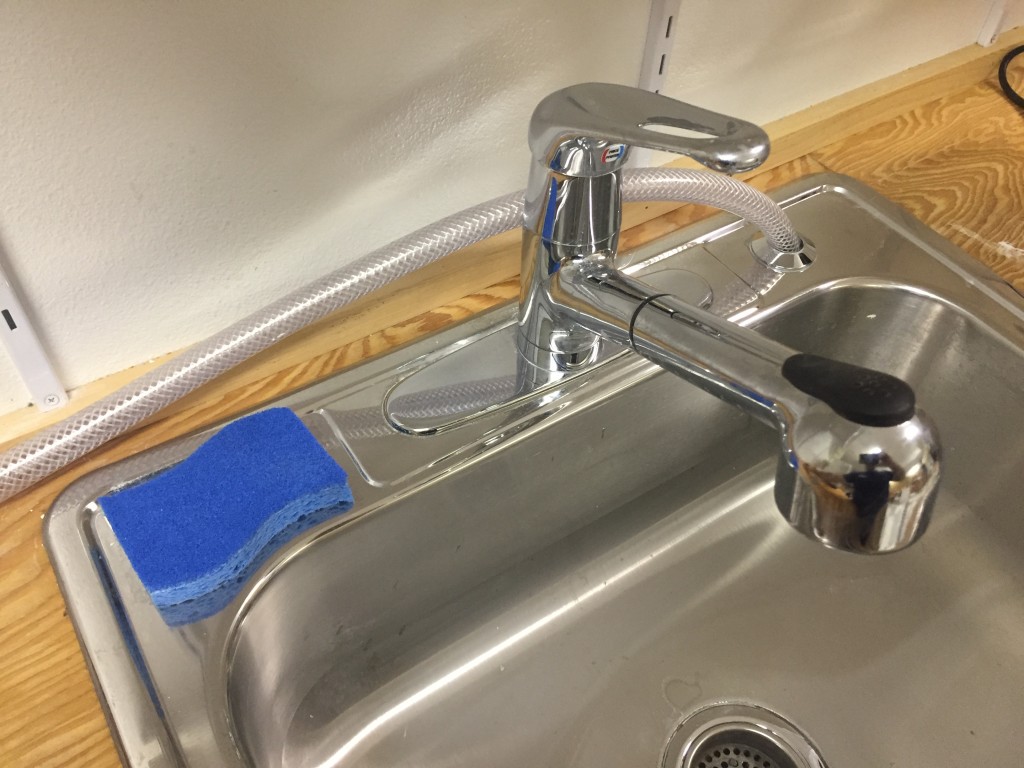
Threading the drain hose through the workshop sink
Then I went under the sink, replaced the PVC drain tail (it wasn’t over-tightened so I didn’t need any tools), then clamped the other end of the drain hose to the barbed drain fitting in the drain tail:
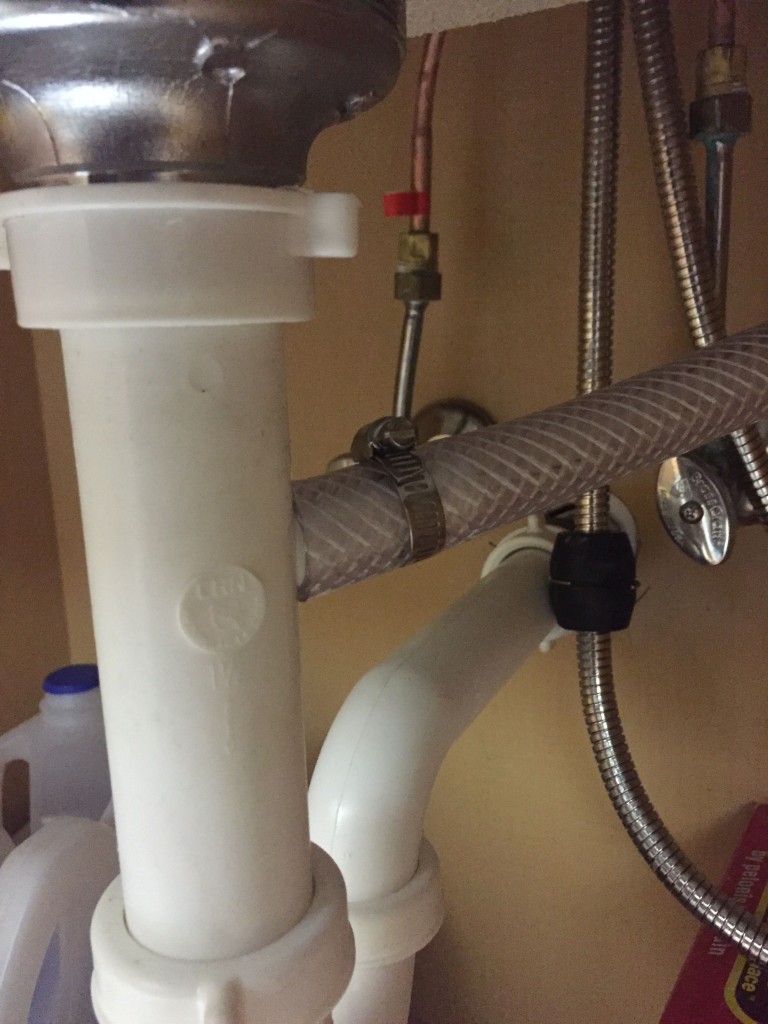
Clamping the drain hose to the drain under the sink
And within a few minutes, I had a continuous drain setup with no need to ever tough the dehumidifier’s bucket:
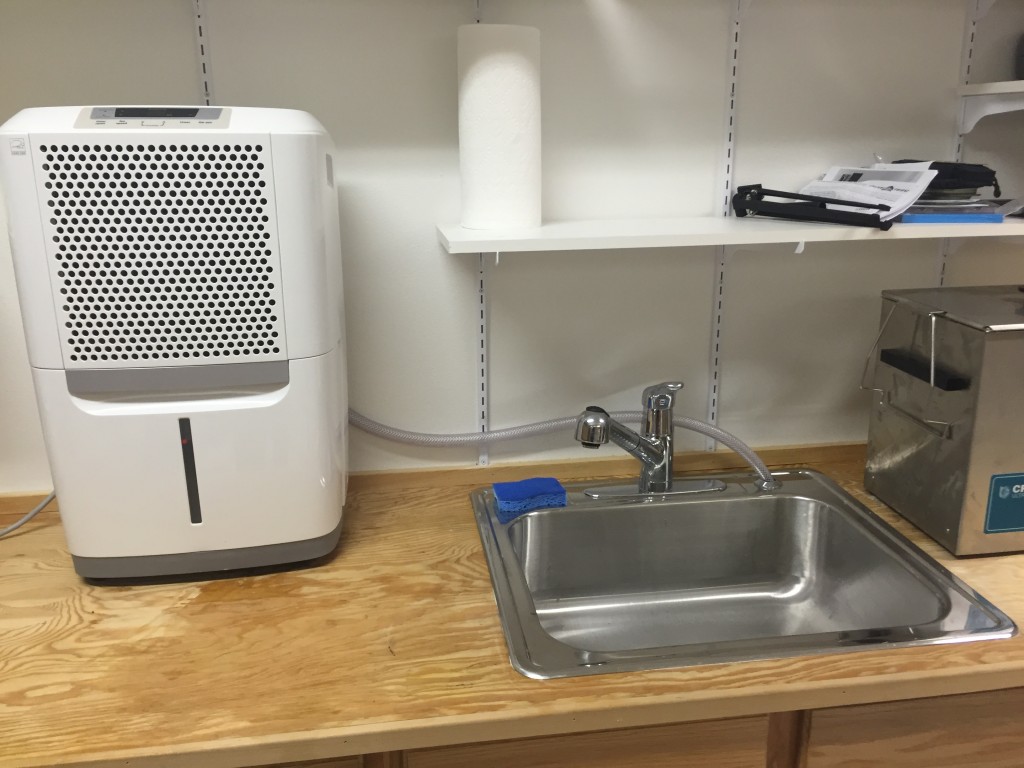
Drain complete!
If you decide to use a dehumidifier in your workshop, gun vault, or gun room, I highly recommend figuring out some way to avoid having to manually drain the bucket. Had I wanted to keep the dehumidifier on the floor, I probably would have run the drain hose to an HVAC condensate pump, which could then pump the drainage “uphill” to the sink or the drain tail. I’m sure you’ll come up with something creative. 🙂
What Is the Perfect Temperature and Humidity for Gun Storage?
Now that I’ve determined what humidity levels I can achieve, it’s worth giving some toward what my workshop’s humidity levels should be. Advice on the subject is mixed, but I came across this paper named Caring for Your Collective Firearms by Doug Wickland, Senior Curator of the National Firearms Museum. He recommends the following:
Temperature: Ideally you should store your collection year-round at about 70 degrees Fahrenheit. Variations in temperature cause wood stocks to expand and contract. While wood is flexible, too much flexing from temperature changes can result in permanent cracks. Keep temperature constant.
Humidity: A middle ground figure of 50% relative humidity caters to both wood and metal components. Too much humidity and the metal parts corrode. Too little and stocks start cracking. Keep humidity constant.
Based on that advice, I’ve set my dehumidifier at 50% and fan on “Lo,” which will make my dehumidifier cheaper to operate, since 50% has been the average indoor humidity this month. Of course, ambient humidity changes with the weather and time of day, so I still believe my dehumidifier will justify its existence by keeping things constant. It’s nice to know that my dehumidifier can do more than I need it to at the current November humidity levels in Seattle, so that on rainy or muggy days, it can keep the workshop right at 50%.
I’ve also configured the ecobee Smart Thermostat in the workshop to fire off an email alert if the humidity in the room drops below 35% or rises above 60%.
After running for 7 hours at a 50% set-point, I’d used 1.76 kWh of electricity. At 10.7 cents per kWh, it works out to less than 65 cents per day to keep my workshop at the perfect humidity for my guns. That’s cheap insurance.
Final Thoughts
For around $200 up front and 65 cents per day in operating costs, using a whole-room dehumidifier is certainly an investment toward keep your gun collection dry. But if you’re serious about protecting your guns from moisture, such an investment is probably worth it.
I’ve been satisfied with the Frigidaire’s performance so far, and will post follow-ups here if anything changes.
For now, I enjoy hearing the humming noise of moisture protection when I walk into the workshop. And I think it looks kind of cool on the bench, too.
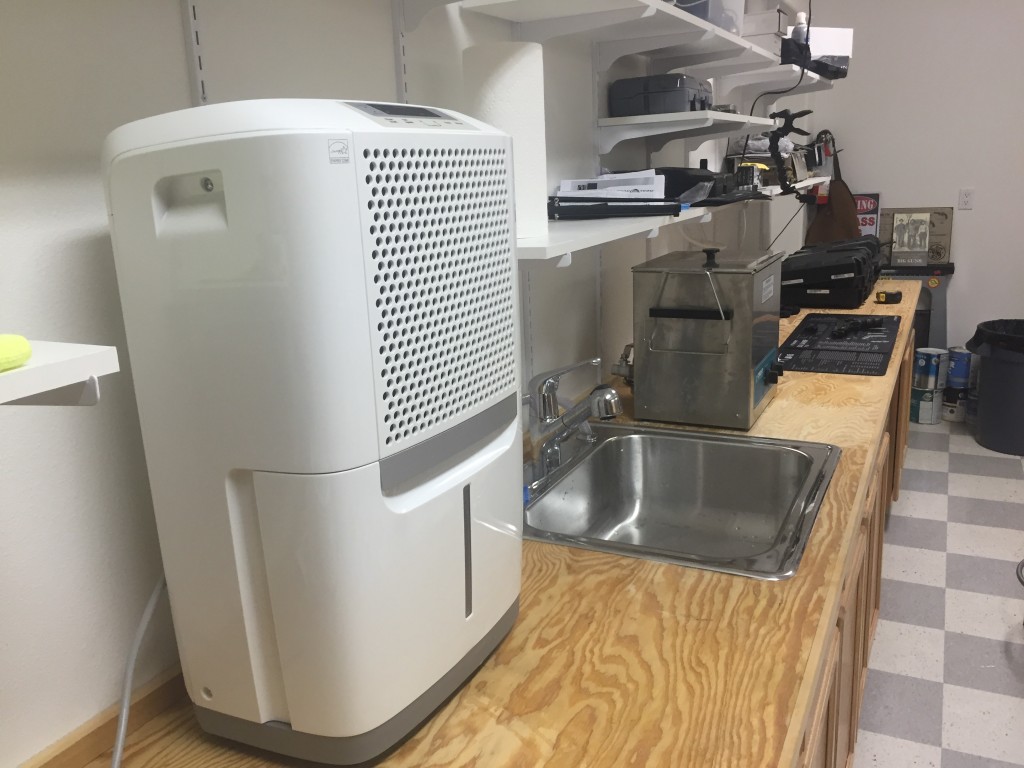
Dehumidifier on the bench
I even like having my old ecobee Smart Thermostat in the workshop, so I can check temperature and humidity from anywhere, as well as use the graphs to see how weather affects the workshop’s humidity. Geek overkill? Sure. But if you’re a reader of this blog, you know that’s nothing new. You could do the same yourself with the ecobee Smart’s cheaper little sister, the ecobee Smart Si.
Links to items mentioned in this article:
- Frigidaire FAD704DWD dehumidifier
- Eva-Dry E-500 mini dehumidifier
- ecobee Smart Si thermostat
- Kill-A-Watt energy usage monitor
As always, I welcome your questions, comments, and feedback below!